About your choir and its leaders
The About section is the second part of your home page, reached from About Us in the menu. It tells visitors who the choir is and who leads it. Everything in it is in Site Settings → Home: About.
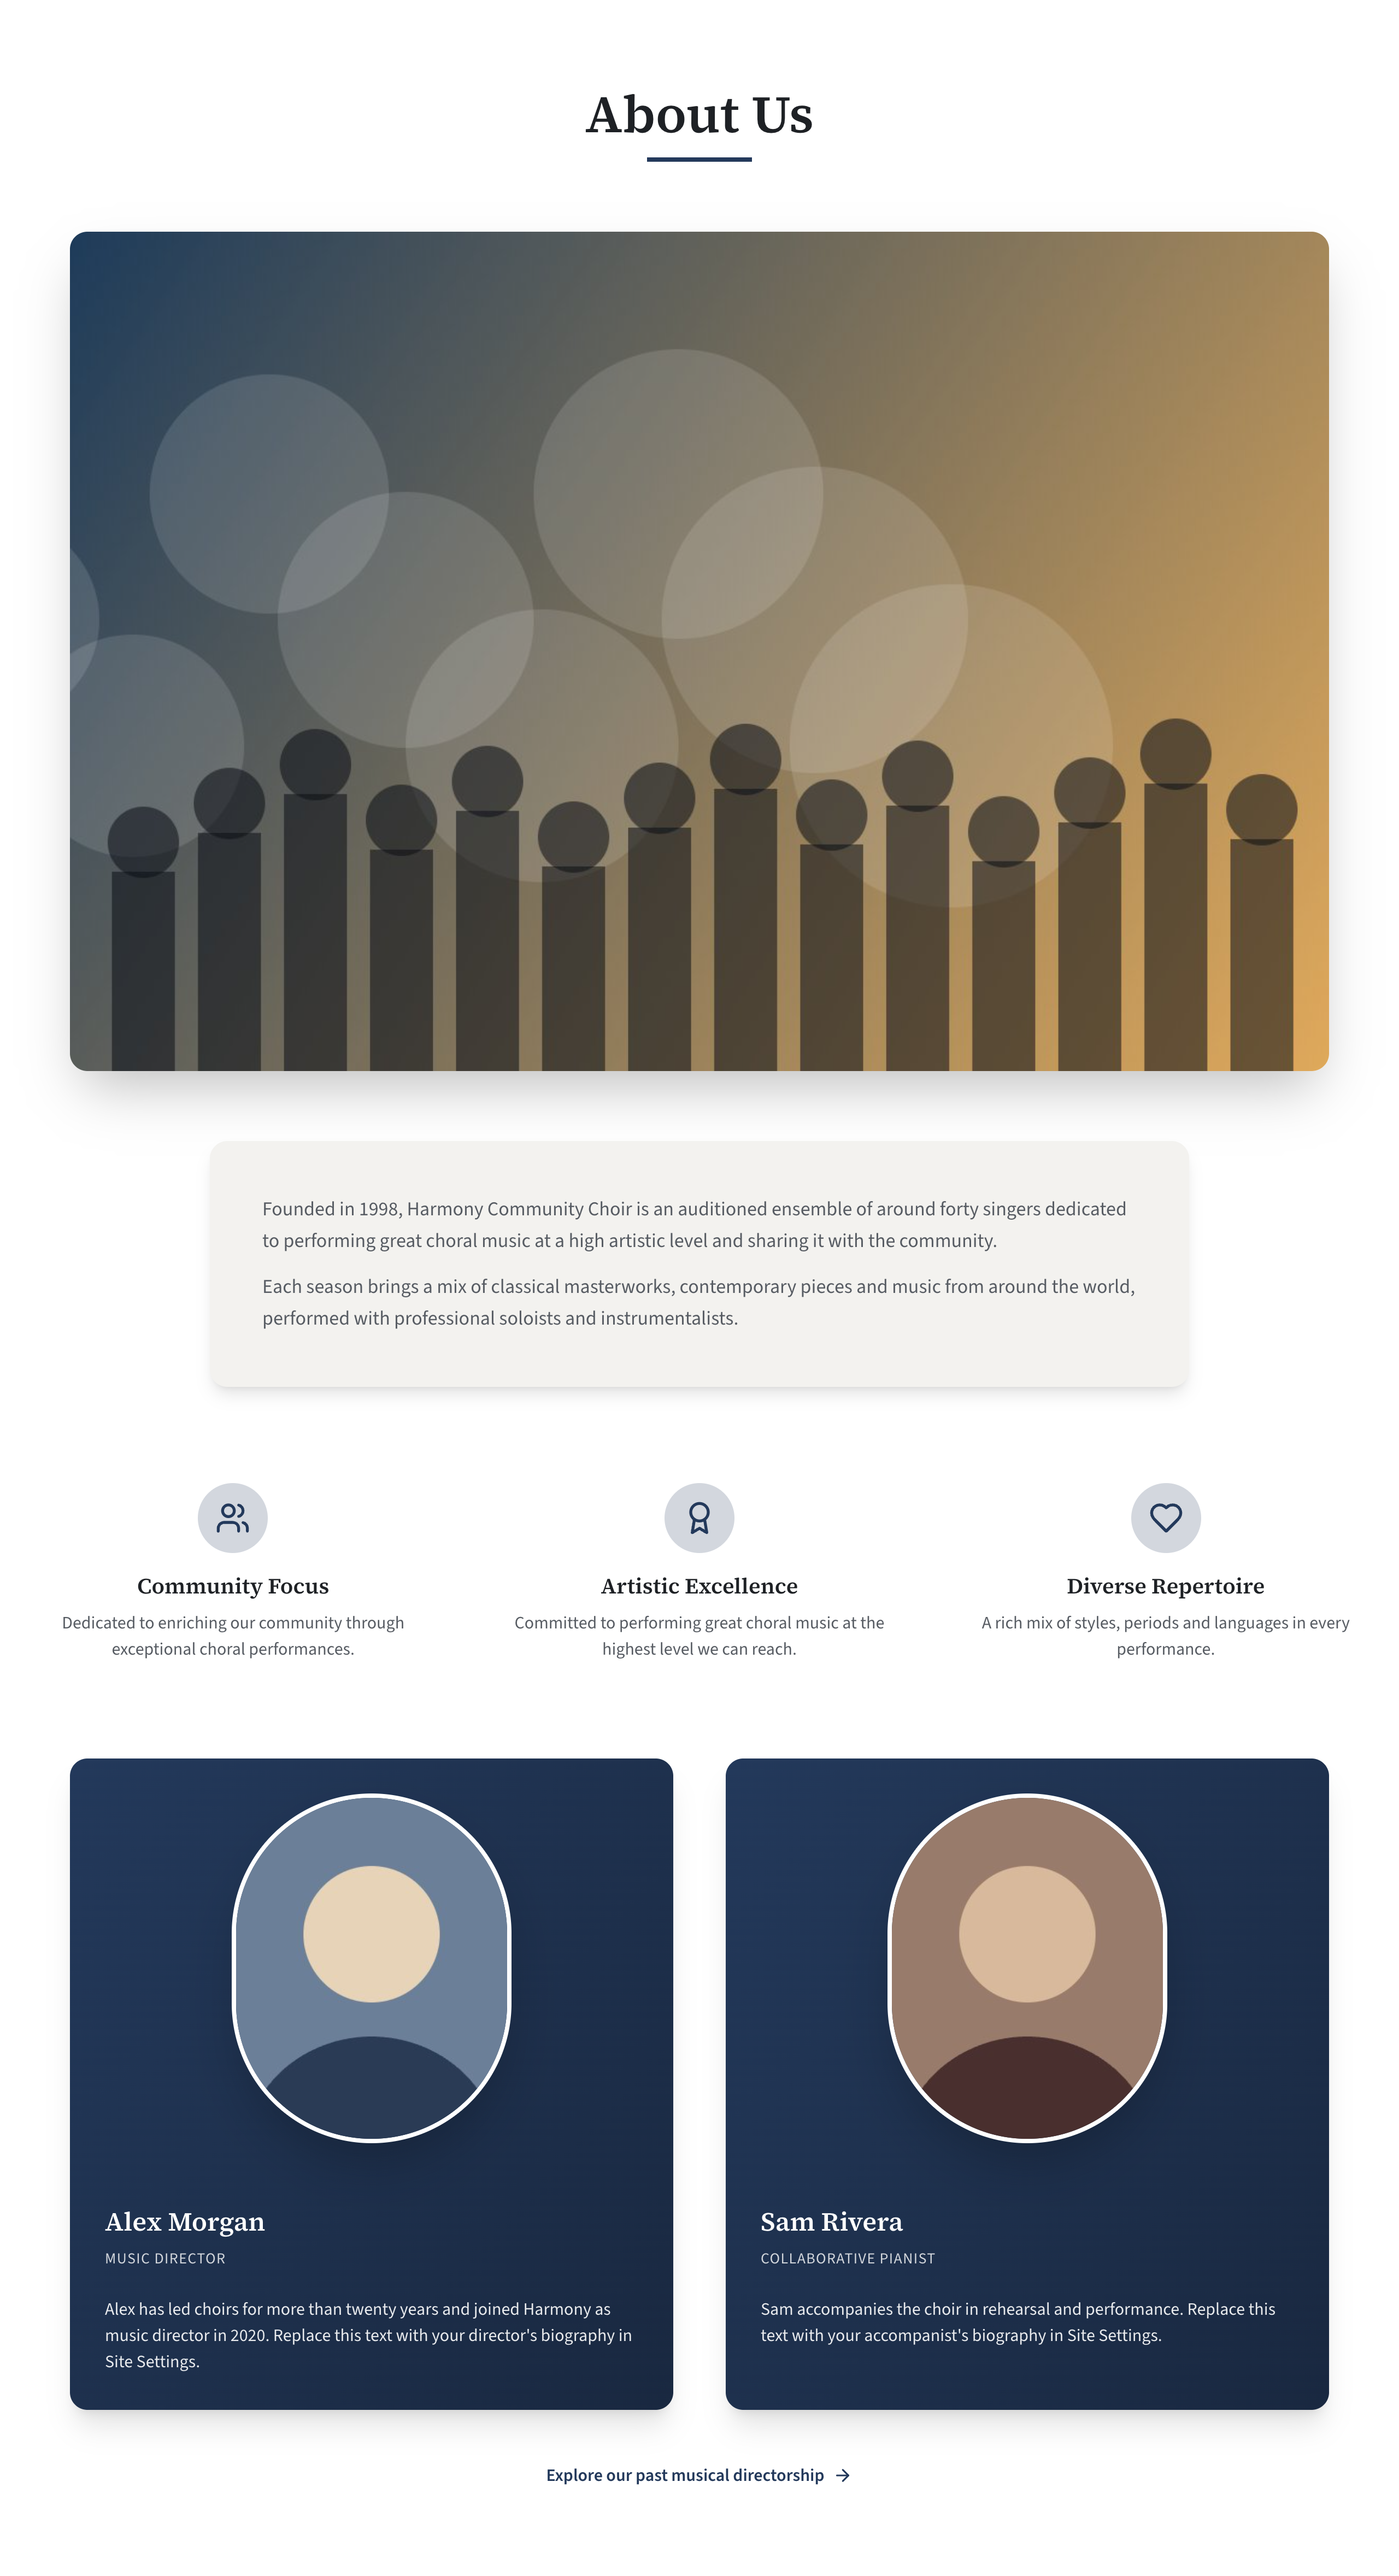
From top to bottom, the section shows: the heading, the group photo, the About text, the highlights, the leaders, and a link to your Past Directors page. Each part is left out when it is empty.
The settings
| Setting | What it does | Limit |
|---|---|---|
| Heading | The section's heading. Empty means "About Us". | 80 characters |
| Group photo | A wide photo across the section. | A picture |
| Photo description (for screen readers) | What the photo shows, in a few words, for visitors who cannot see it. | 200 characters |
| About the choir | The main text, with formatting. | |
| Highlights | Boxes with an Icon, a Title and a Text. | Up to 4 |
| Leadership | Your leaders, each with a Name, Role, Photo and Biography. | Up to 6 |
| Link to past directors page | The words of the link under the leaders. | 100 characters |
The heading here is not the menu item. The menu always says About Us.
Write the About text
- Go to Site Settings → Home: About.
- Type or paste into About the choir. Use the buttons above the box for bold, italics, lists and links: see Format text with the editor.
- Select Save.
Two or three short paragraphs is plenty: when the choir began, what it sings, what singing with it is like. The writing assistant can draft this for you in the guided setup.
Add a group photo
- Under Group photo, select Upload image and choose the photo. It is shown at the full width of the section and keeps its shape, so a wide photo suits it best.
- In Photo description (for screen readers), say what it shows: "The choir on the steps of St. Andrew's Hall".
- Select Save.
To have no photo, select Remove under the box. A new site shows a placeholder picture here until you replace or remove it. See Upload a picture into a setting.
Add highlight boxes
Highlights are short points about the choir, each under a round icon: "Community Focus", "Artistic Excellence".
- Under Highlights, select Add.
- Choose an Icon, and type a Title (60 characters at most) and a Text (300 at most).
- Select Save.
Two, three or four highlights sit side by side on a wide screen. The icons are listed in The icon chooser.
Add your director and other leaders
On screen, under the list: "Music director, accompanist, assistant director..."
- Under Leadership, select Add.
- Type the person's Name and Role (100 characters each).
- Under Photo, select Upload image. The photo is shown in a tall oval, cropped around its centre, so use a portrait with the face in the middle.
- Write the Biography, with formatting if you like.
- Select Save.
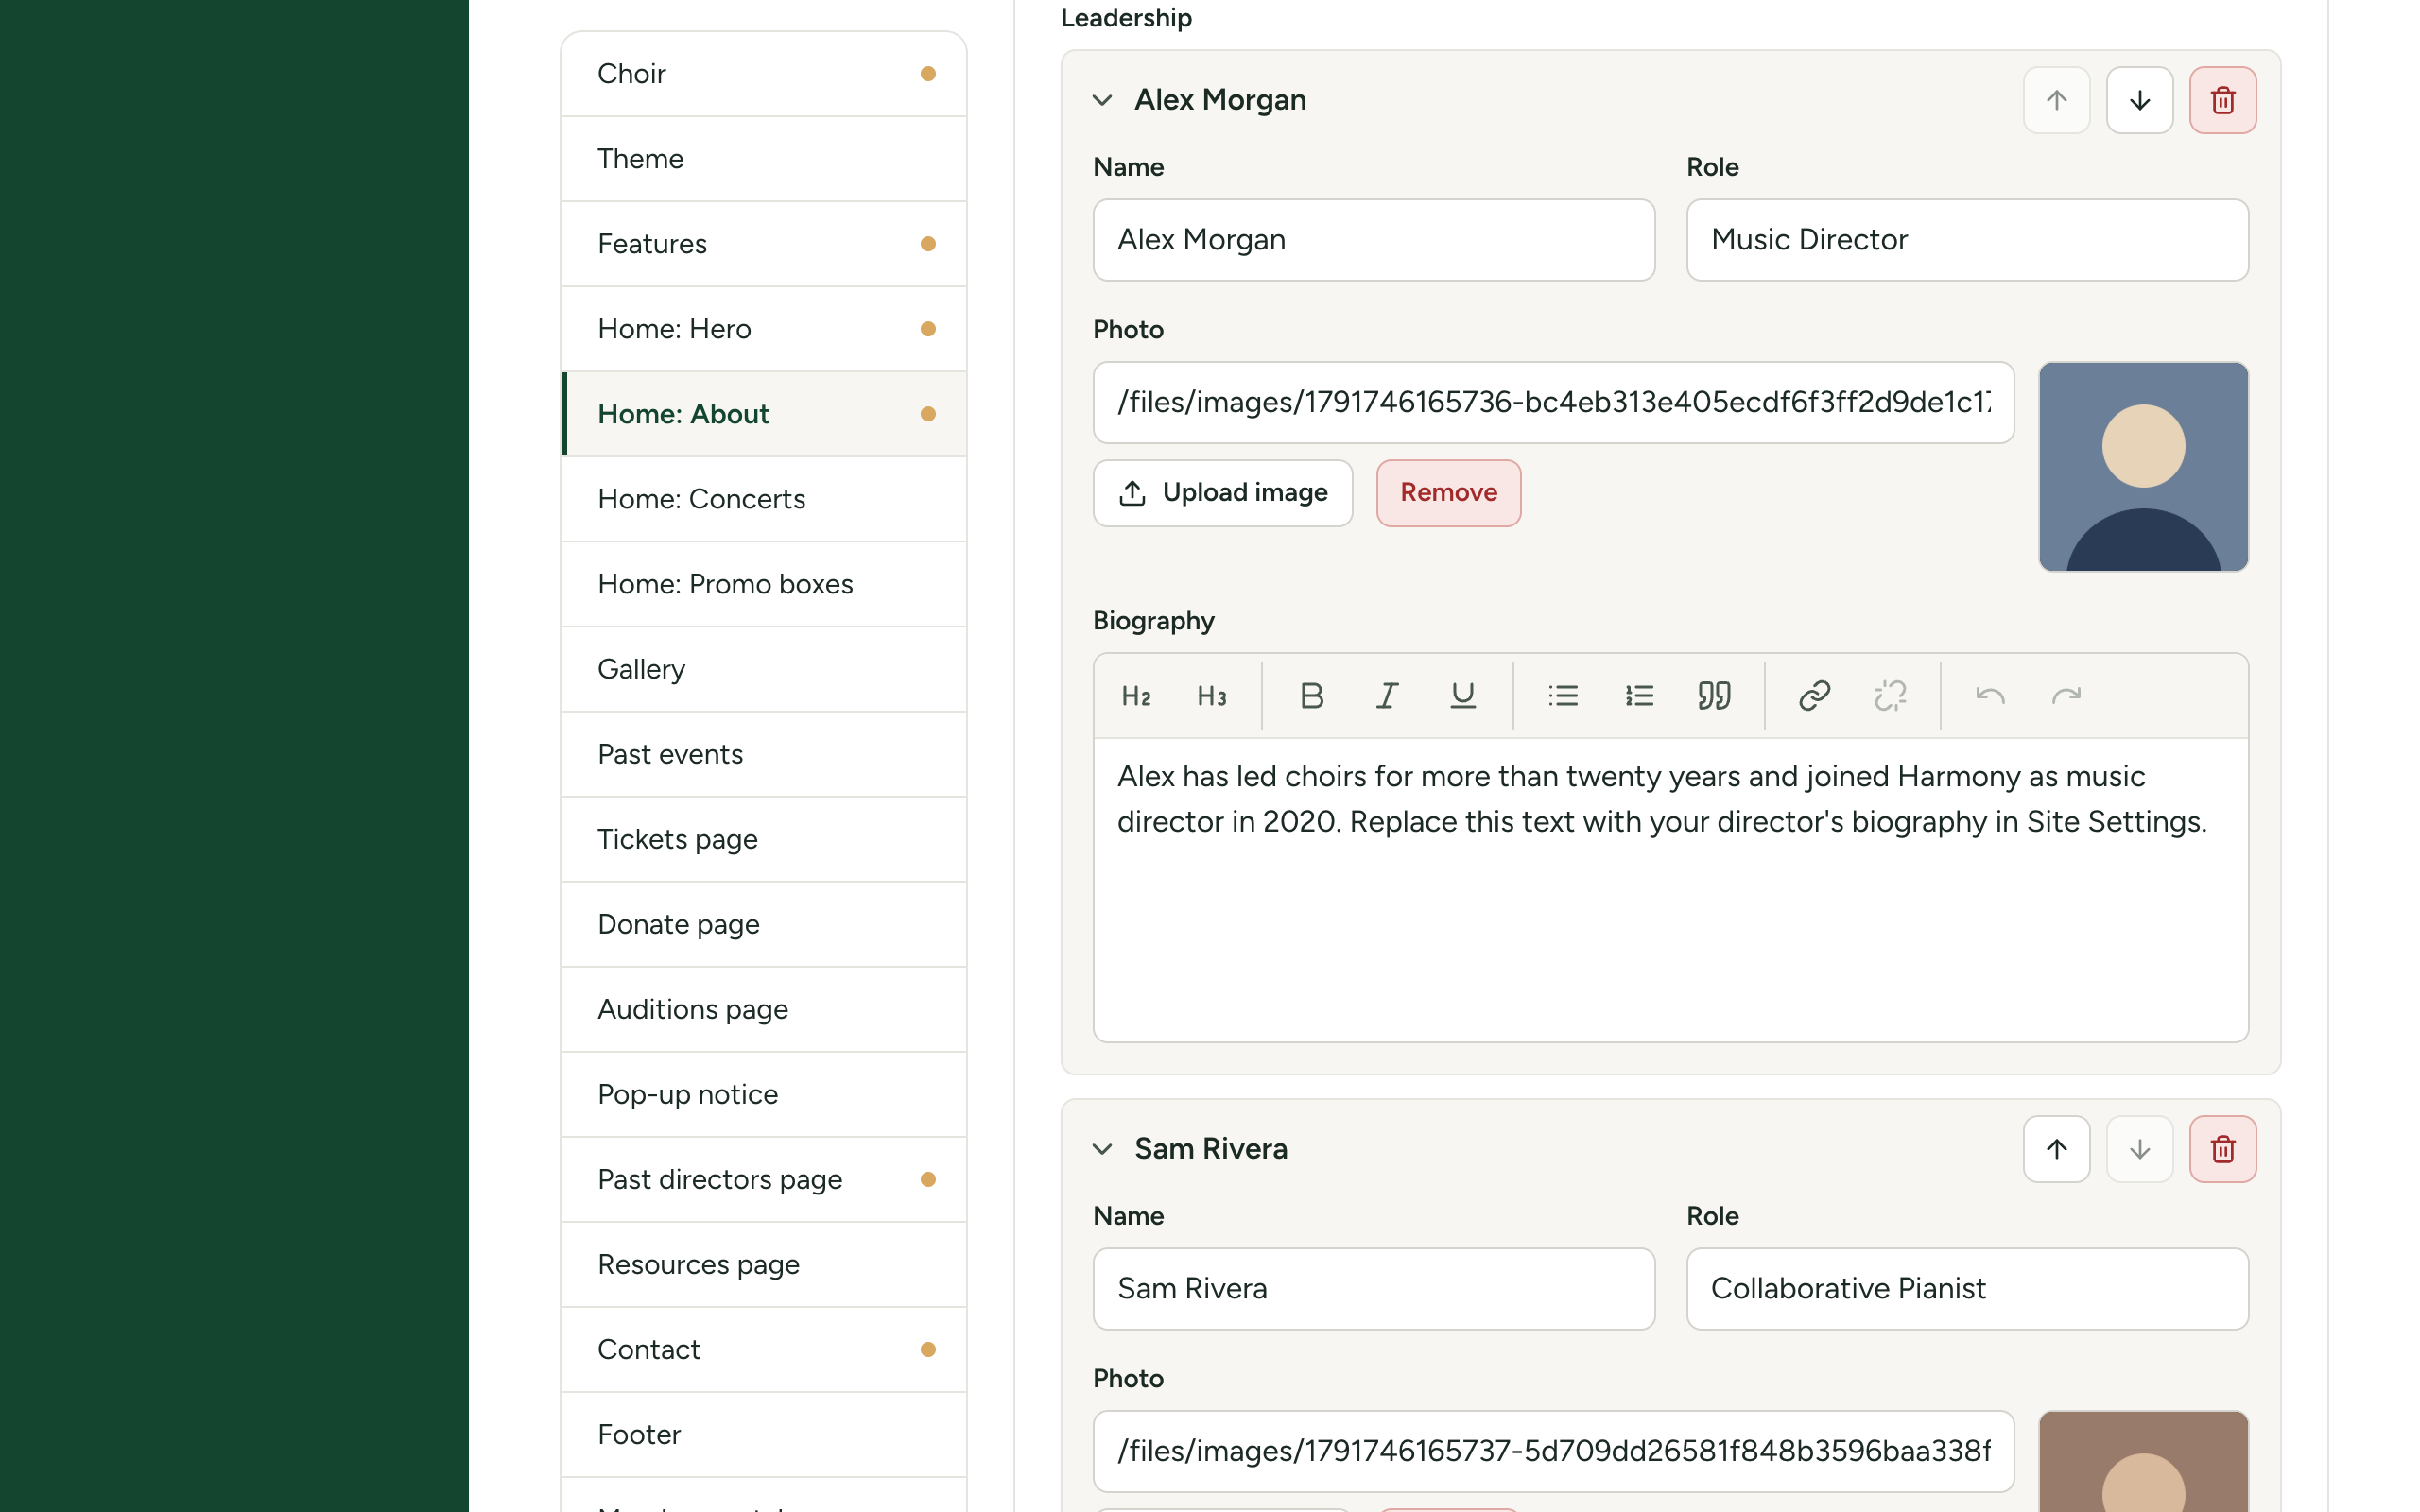
To change the order, use the arrows on each entry: the first in the list is shown first. When someone leaves, remove their entry with the bin, and consider adding them to your Past Directors page.
One leader is shown in a single centred card. Two or more are shown two to a row on a wide screen.
Entries that are not shown
- A highlight with no Title is not shown.
- A leader with no Name is not shown.
This lets you prepare an entry and finish it later. Give it a title or a name when it is ready.
The link to your Past Directors page
Under the leaders there can be a link such as "Explore our past musical directorship". It appears only when both of these are true:
- Past directors page is ticked in Features;
- Link to past directors page here has some words in it.
To hide the link but keep the page, empty the box. The page itself is set up in Your Past Directors page.