Set up your site step by step
A new site is filled with a sample choir, so that you can see what every page looks like. The guided setup, headed Set up your site, replaces the most important sample details with your own in six short steps. This page is for the admin who logs in to a new site for the first time.
Nothing here is final. Every answer can be changed later in Site Settings, and the table at the end of this page says where.
When the setup appears
You are taken to the setup automatically when you open the dashboard of a site that has not been set up yet. Its address is your site's address followed by /admin/setup.
- Only a Site Admin or an Admin is taken there. A Manager never sees it and goes straight to the dashboard. See The three kinds of admin.
- If you close the page part-way through, you are taken back to it the next time you open the dashboard. It starts again at step 1; whatever you already saved has been kept.
- Once you finish it or press Skip setup, you are never sent there again.
How the setup works
The six steps are listed across the top: 1. Your choir, 2. Look, 3. Words, 4. Contact, 5. Features, 6. Done. The one you are on is underlined.
| Button | What it does |
|---|---|
| Save and continue | Saves this step and moves to the next. |
| Skip this step | Moves to the next step without saving this one. Offered on steps 2 to 5. |
| Back | Returns to the previous step. Nothing is undone. |
| Skip setup | At the top right. Leaves the setup for good and opens the dashboard. Whatever you saved on earlier steps is kept. |
An empty box means "leave it as it is". If you leave a box empty and press Save and continue, the setup does not blank that part of your site: it keeps whatever is there now, which on a new site is the sample text. To remove sample text you do not want, replace it later in Site Settings.
Until the setup has been finished or skipped, the boxes start empty rather than showing the sample choir's details. That is also true if you leave part-way and come back: apart from your choir's name and time zone (and, on a site we host, the currency), the boxes are empty again, but what you saved is still on your site, and leaving a box empty keeps it. If you open the setup again after finishing it, the boxes show what your site has now.
Step 1: Your choir
A few facts about your choir. They appear around the site and shape the suggestions on the following steps.
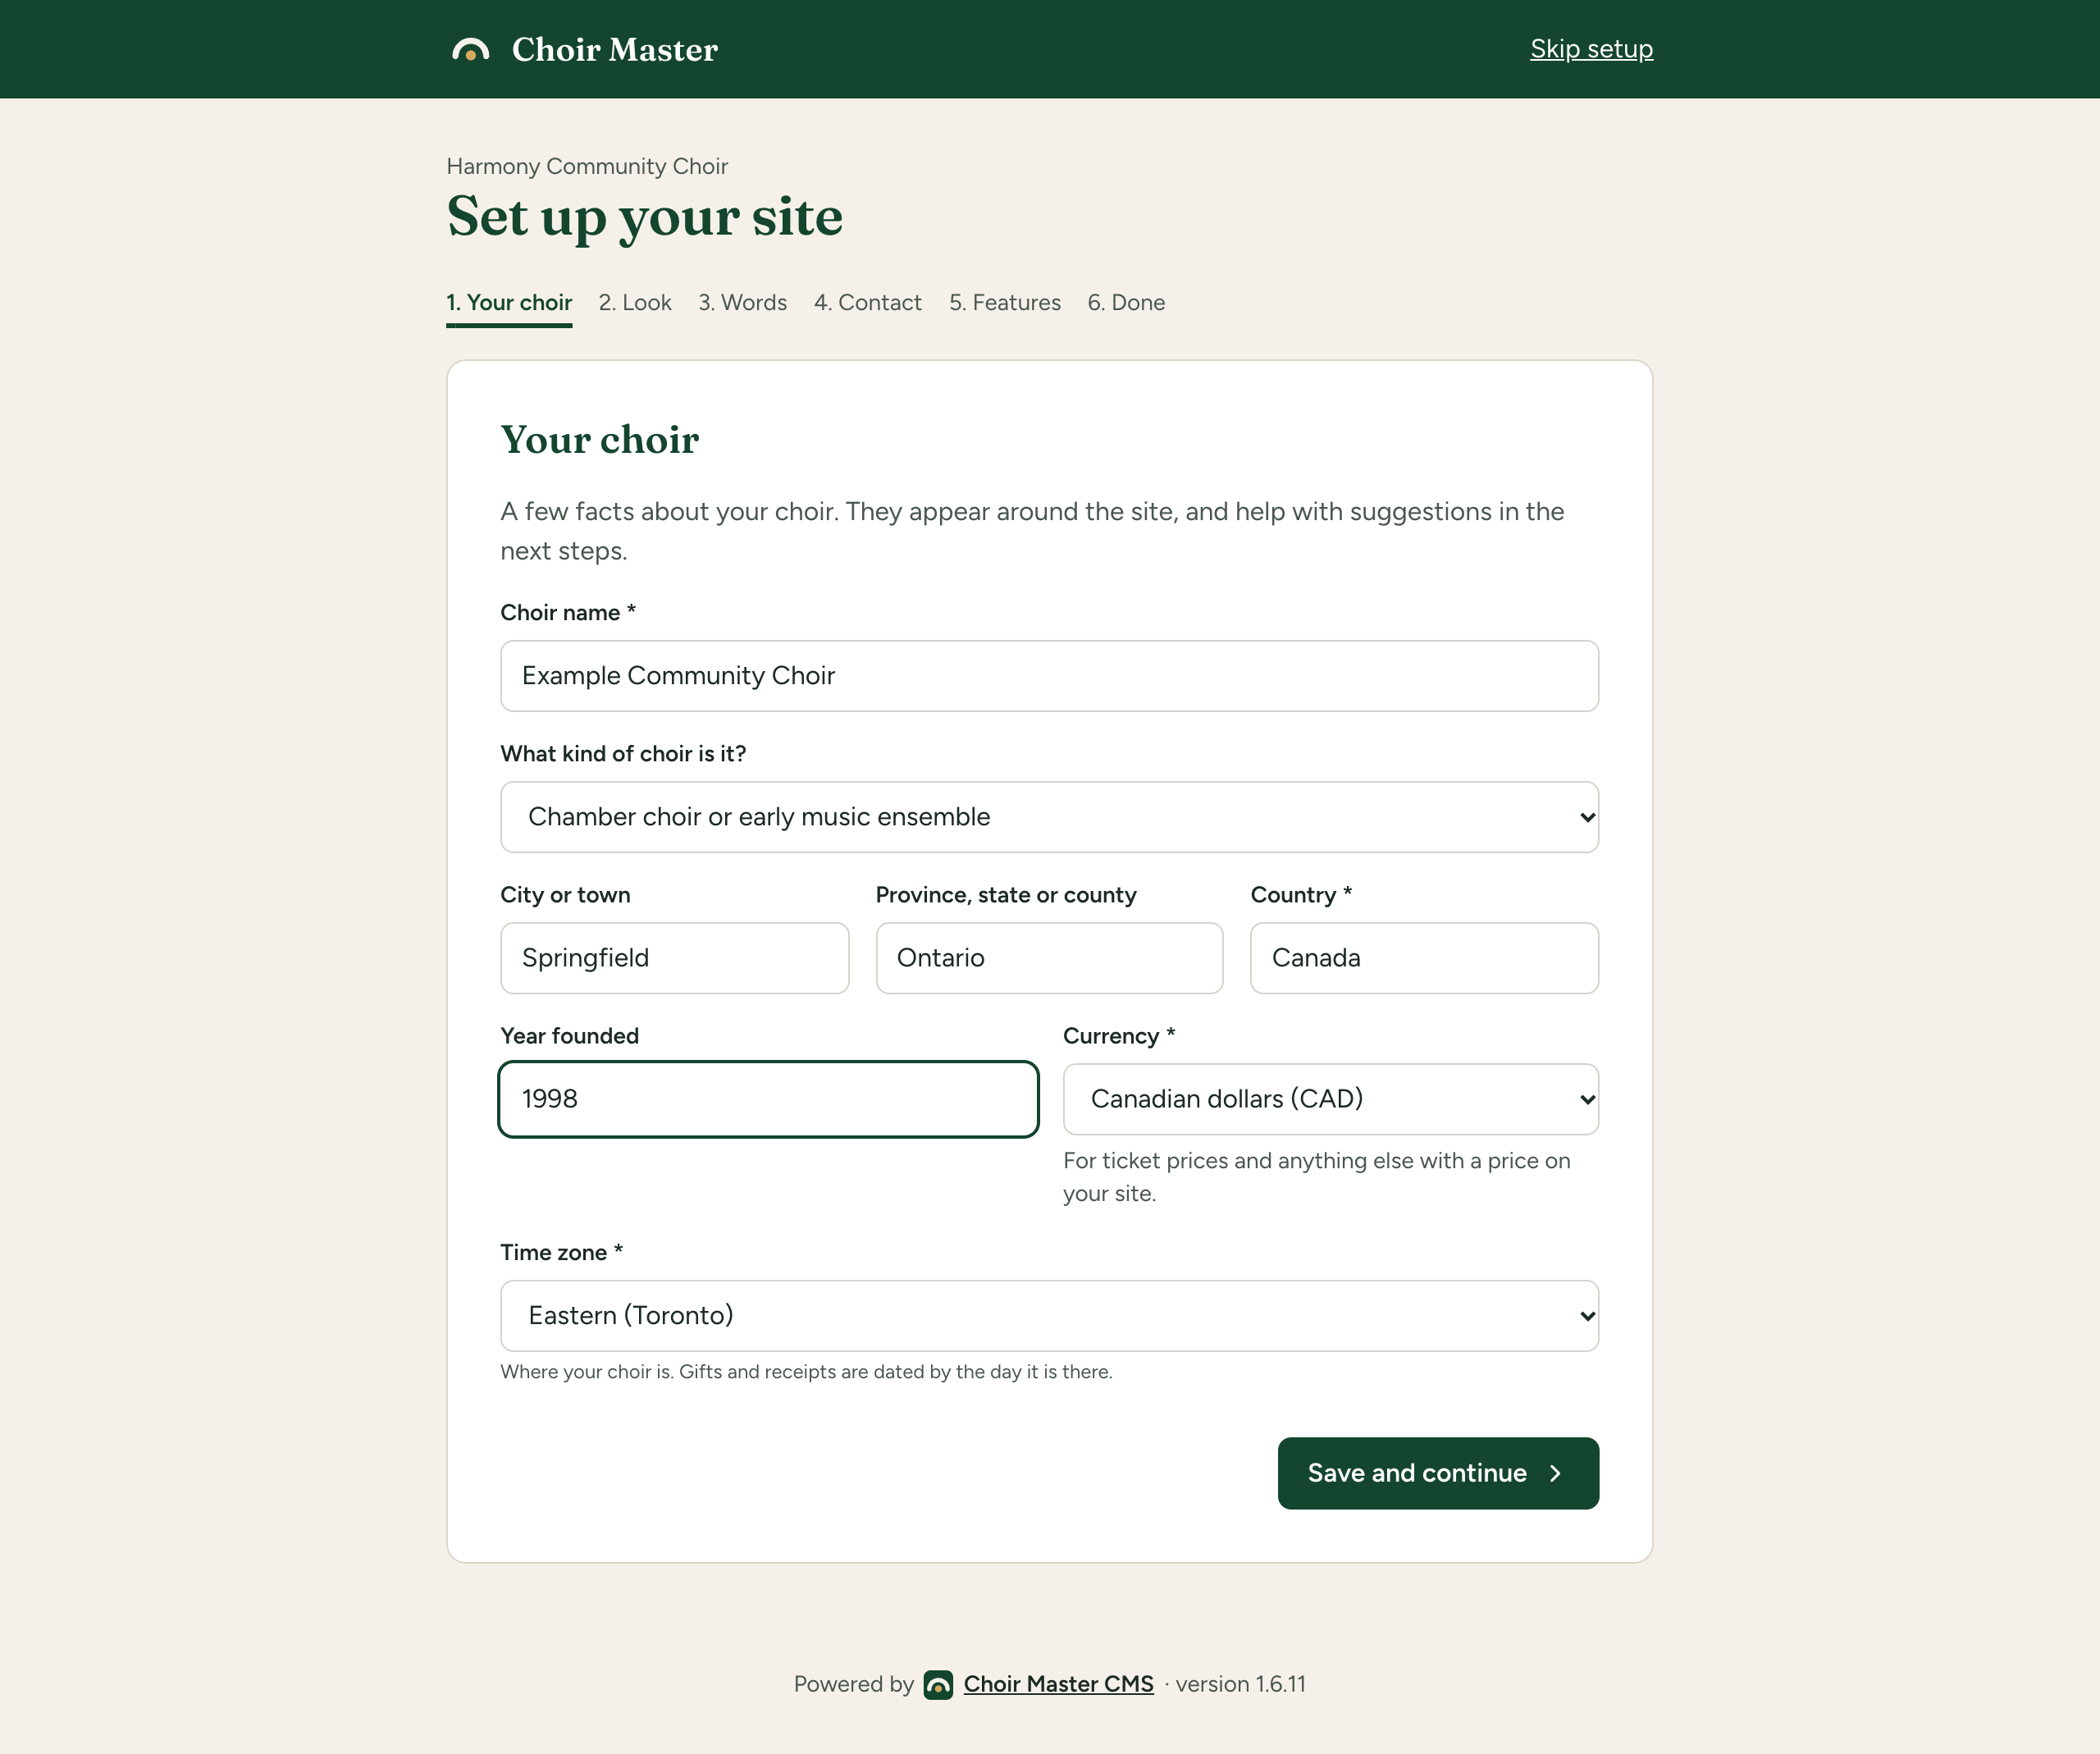
| Box | Required | What it is for |
|---|---|---|
| Choir name | Yes | Your choir's full name, shown in the header, the footer and emails. Up to 120 characters. |
| What kind of choir is it? | No | Decides which ready-made look is marked Suggested on the next step, and tells the writing assistant what kind of choir it is writing for. |
| City or town | No | Where the choir is based. Up to 80 characters. |
| Province, state or county | No | Up to 80 characters. |
| Country | Yes | Up to 80 characters. |
| Year founded | No | Four digits, such as 1998. Anything else is ignored. |
| Currency | Yes | The currency for ticket prices and anything else with a price on your site. |
| Time zone | Yes | Where your choir is. Gifts and receipts are dated by the day it is there. |
If a required box is empty, the step is not saved and a message at the top says which: Your choir's name is the one thing the site cannot do without., Enter the country your choir is in., Choose the currency your prices are in. or Choose the time zone your choir is in.
The kinds of choir
There are fifteen to choose from:
- Community choir
- Symphonic or festival chorus
- Chamber choir or early music ensemble
- Church or parish choir
- Cathedral choir
- Gospel choir
- Pop or rock choir
- Show choir or musical theatre group
- A cappella or vocal ensemble
- Barbershop chorus or quartet
- Folk, world or community singing group
- Children's choir
- School or training choir
- Youth choir
- Something else
The currencies
There are fourteen: Canadian dollars (CAD), US dollars (USD), Pounds sterling (GBP), Euros (EUR), Australian dollars (AUD), New Zealand dollars (NZD), Swiss francs (CHF), Swedish kronor (SEK), Norwegian kroner (NOK), Danish kroner (DKK), South African rand (ZAR), Singapore dollars (SGD), Hong Kong dollars (HKD) and Mexican pesos (MXN).
The time zone
On a new site the Time zone box is already set to the time zone of the computer or phone you are using, when that zone is on the list. Otherwise it is set to Eastern (Toronto). Check it: if you are setting the site up while away from home, or for a choir somewhere else, choose the choir's own zone. The list is grouped by Canada, United States, United Kingdom and Ireland, Europe, Australia and New Zealand, and Elsewhere.
What saving this step does to the sample content
On a brand-new site, pressing Save and continue on step 1 also takes the sample choir out of the places that named it, so that your site does not go on calling itself Harmony Community Choir:
| Part of the site | What it becomes |
|---|---|
| Short name | Emptied. |
| Logo | Removed, because the sample logo has the sample choir's name in it. |
| Tagline | "Singing together since" followed by the year, if you gave one; otherwise emptied. |
| Description for search engines | A sentence made from your choir's name and town, such as "Example Choir is a choir in Exampleton." |
| Main heading at the top of the home page | Your choir's name. |
| Statistics at the top of the home page | Removed. The sample choir's years, voices and concerts are not yours. |
| About text on the home page | A short welcome that names your choir and invites you to write your own. |
| Leaders' biographies | The sample choir's name is replaced with yours. The sample people stay until you change them. |
| Address lines in the contact details | Your town alone, or nothing if you gave no town. |
| Credit line in the footer | "Made with ♥ in" followed by your town, or emptied if you gave no town. |
Each of these is changed only if it still holds the sample content exactly. Anything you or anyone else has already edited is never touched. It only happens while the setup is unfinished; saving step 1 again later changes nothing but the boxes on that step.
Step 2: Look
Pick a look: a set of colours and fonts chosen to go together. Each is a card with its name, a short description and a strip of its colours.
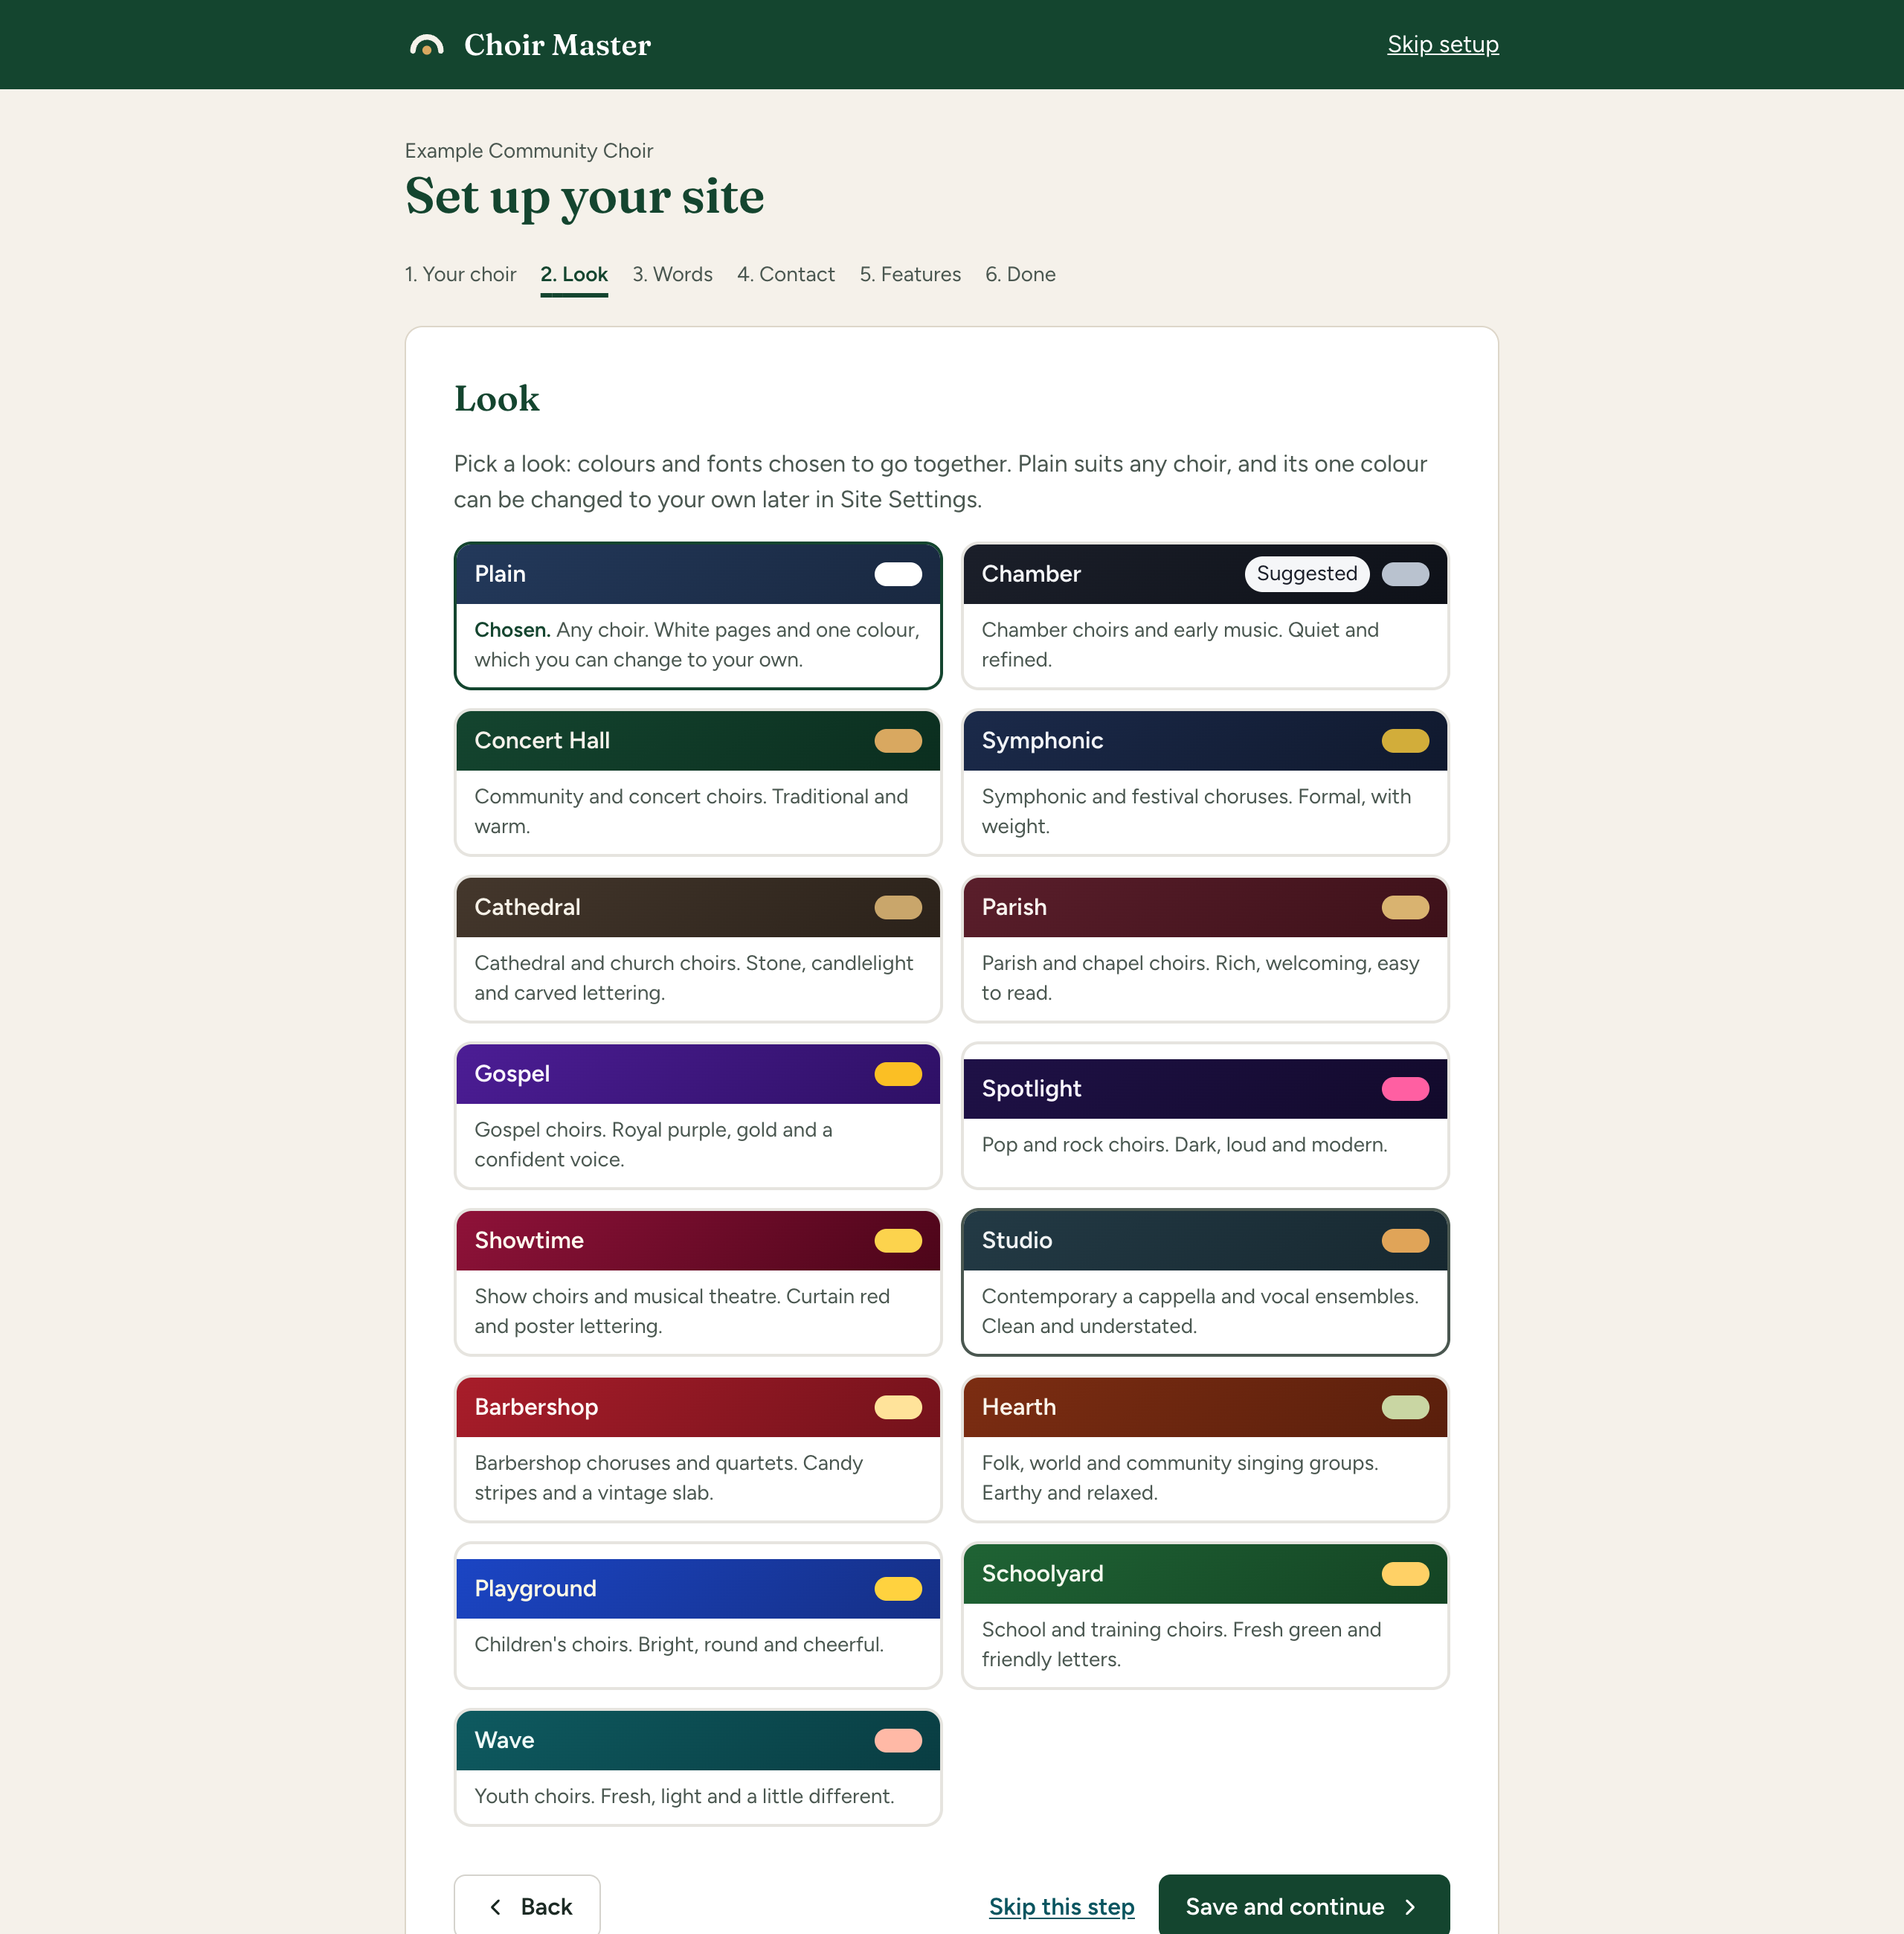
- Plain comes first and is already chosen on a new site. It suits any choir: white pages and one colour, which you can change to your own later.
- The look made for your kind of choir comes second and is marked Suggested. There is no Suggested mark if you did not say what kind of choir it is, or chose Community choir or Something else, because the look suggested for those is Plain.
- Press a card to choose it. The card you have chosen says Chosen. before its description.
Nothing is required here. If you come back to an unfinished setup after choosing another look, Plain is shown as chosen again: press Skip this step to keep the look you saved before.
The look is applied to your public site and member portal when you press Save and continue. The admin panel keeps its own colours whatever you choose.
To change one colour or one font afterwards, see Choose a ready-made theme, Change your colours and Change your fonts.
Step 3: Words
The words visitors read first. None is required.
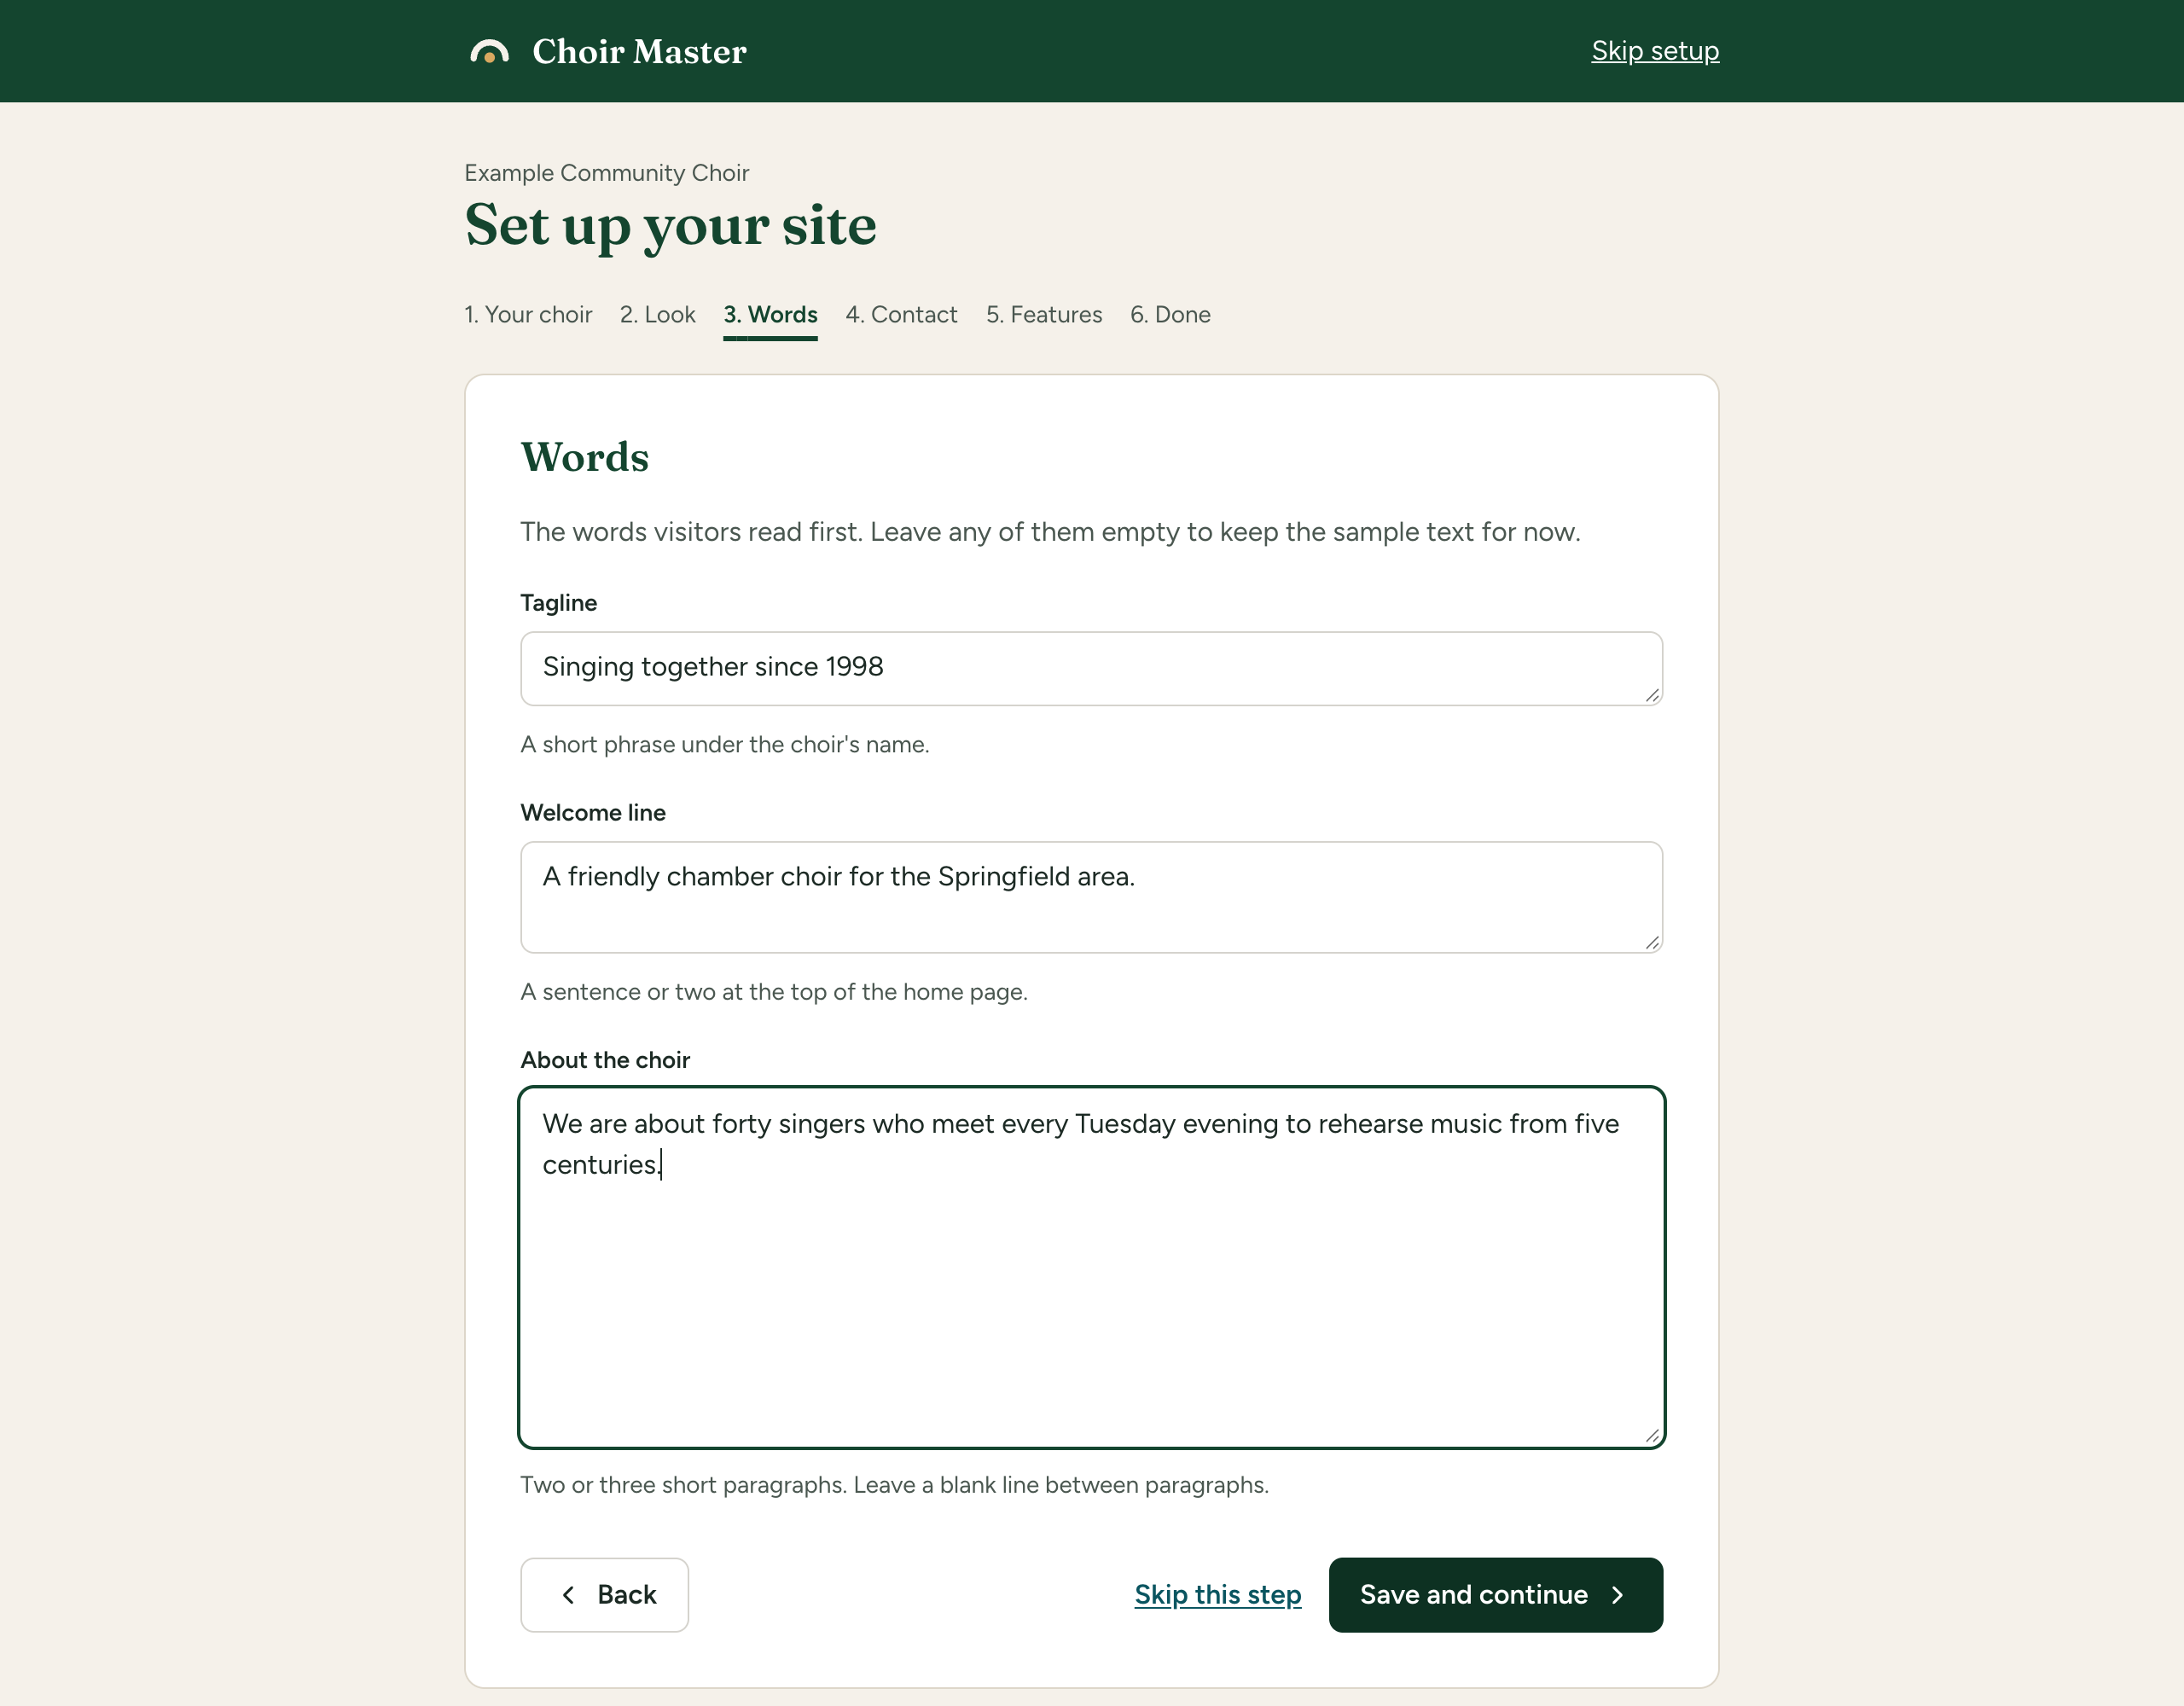
| Box | What it is | Longest |
|---|---|---|
| Tagline | A short phrase under the choir's name. | 120 characters |
| Welcome line | A sentence or two at the top of the home page. | 300 characters |
| About the choir | Two or three short paragraphs for the About section of the home page. Leave a blank line between paragraphs. | 1,500 characters |
If your site has the writing assistant, there is also a box at the top, Anything the writing assistant should know?, and two buttons under each box that can write a draft or tidy what you typed. See Let the writing assistant draft your words.
The About the choir box takes plain paragraphs only. For headings, links, bold and lists, edit it afterwards in Site Settings.
Step 4: Contact
How people reach you. These are shown on your public site, so give the choir's public details and not anyone's private ones. None is required.
| Box | What it is |
|---|---|
| Public email address | The address shown to visitors. Up to 200 characters. |
| Phone number | Up to 40 characters. |
| Address or where you rehearse | One line of the address on each line of the box. Up to five lines. |
| Introduction to the contact section | A sentence or two inviting people to get in touch. Up to 400 characters. The writing assistant can draft this one too. |
Where contact form messages are sent, and your social media links, are set afterwards. See Contact details and social media.
Step 5: Features
Tick the parts of the site you want. Anything unticked disappears from your site's menus; you can switch it on later.
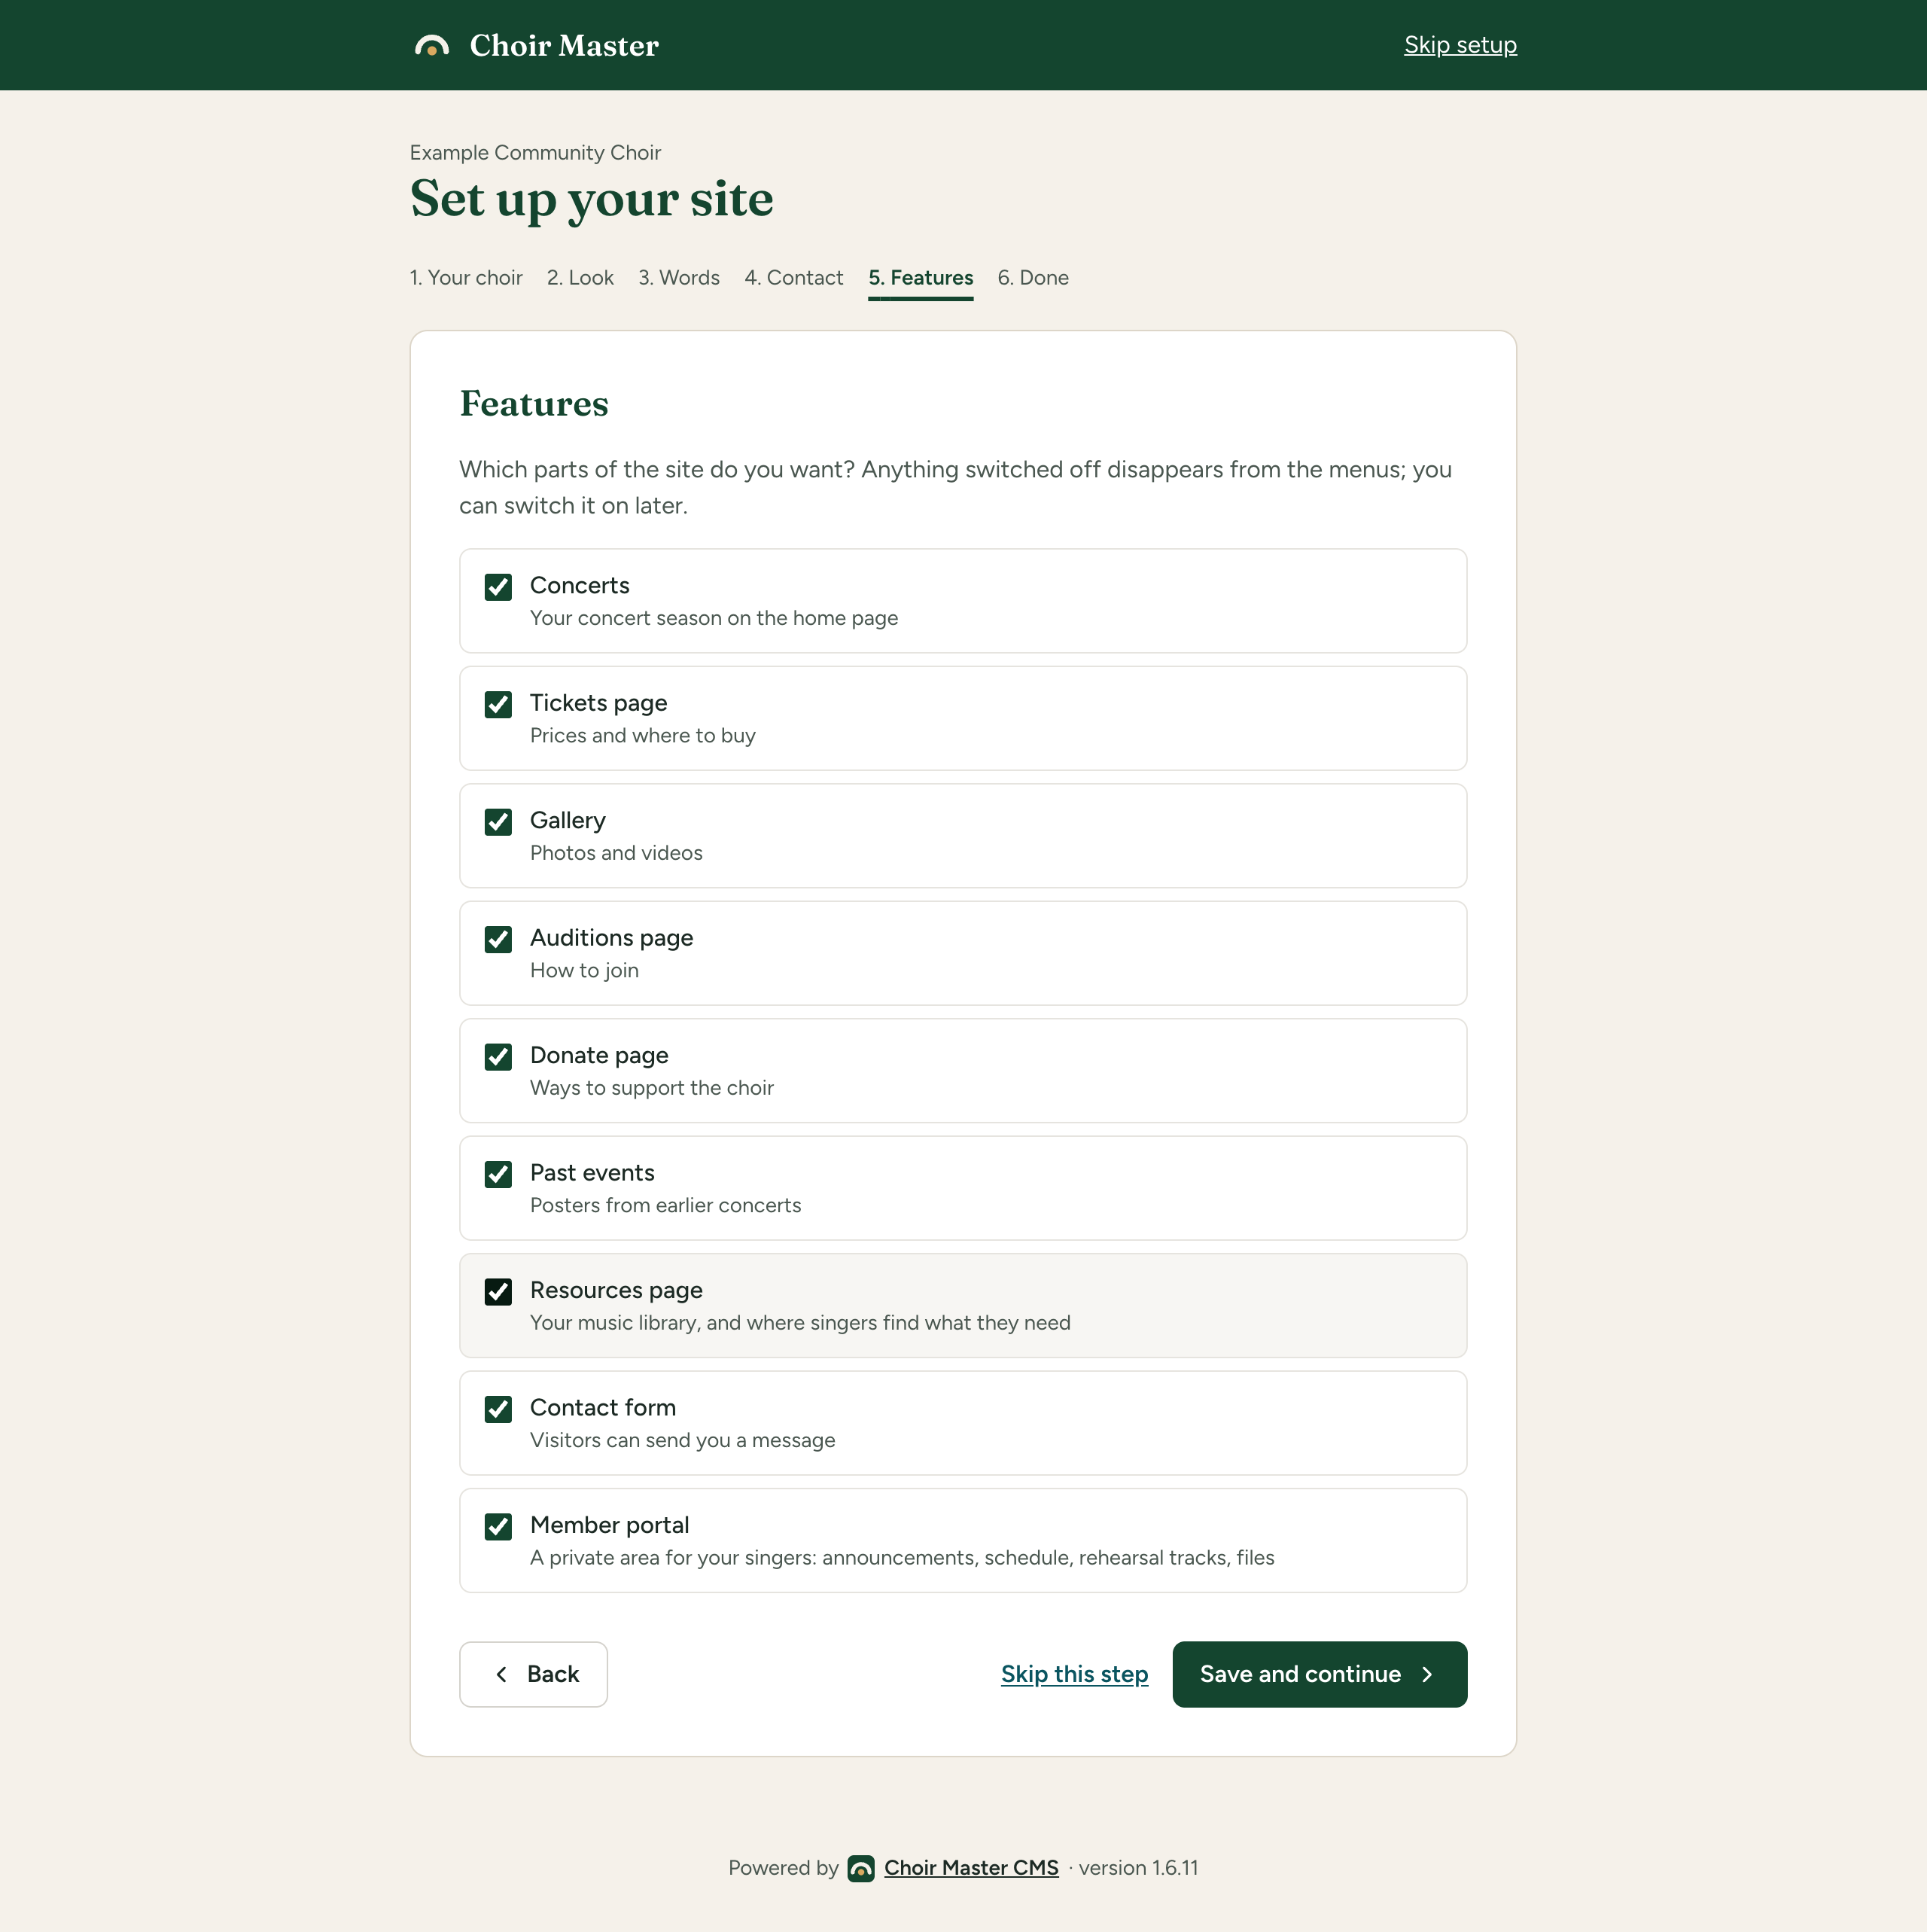
| Tick box | What it is |
|---|---|
| Concerts | Your concert season on the home page. |
| Tickets page | Prices and where to buy. |
| Gallery | Photos and videos. |
| Auditions page | How to join. |
| Donate page | Ways to support the choir. |
| Past events | Posters from earlier concerts. |
| Resources page | Your music library, and where singers find what they need. |
| Contact form | Visitors can send you a message. |
| Member portal | A private area for your singers: announcements, schedule, rehearsal tracks, files. |
The boxes start as the site has them now. These nine are the main switches; Site Settings has more, including ticket sales and donor records, which are separate from the Tickets page and Donate page here. See Switch pages and features on or off.
Step 6: Done
The last screen says Your site is set up.
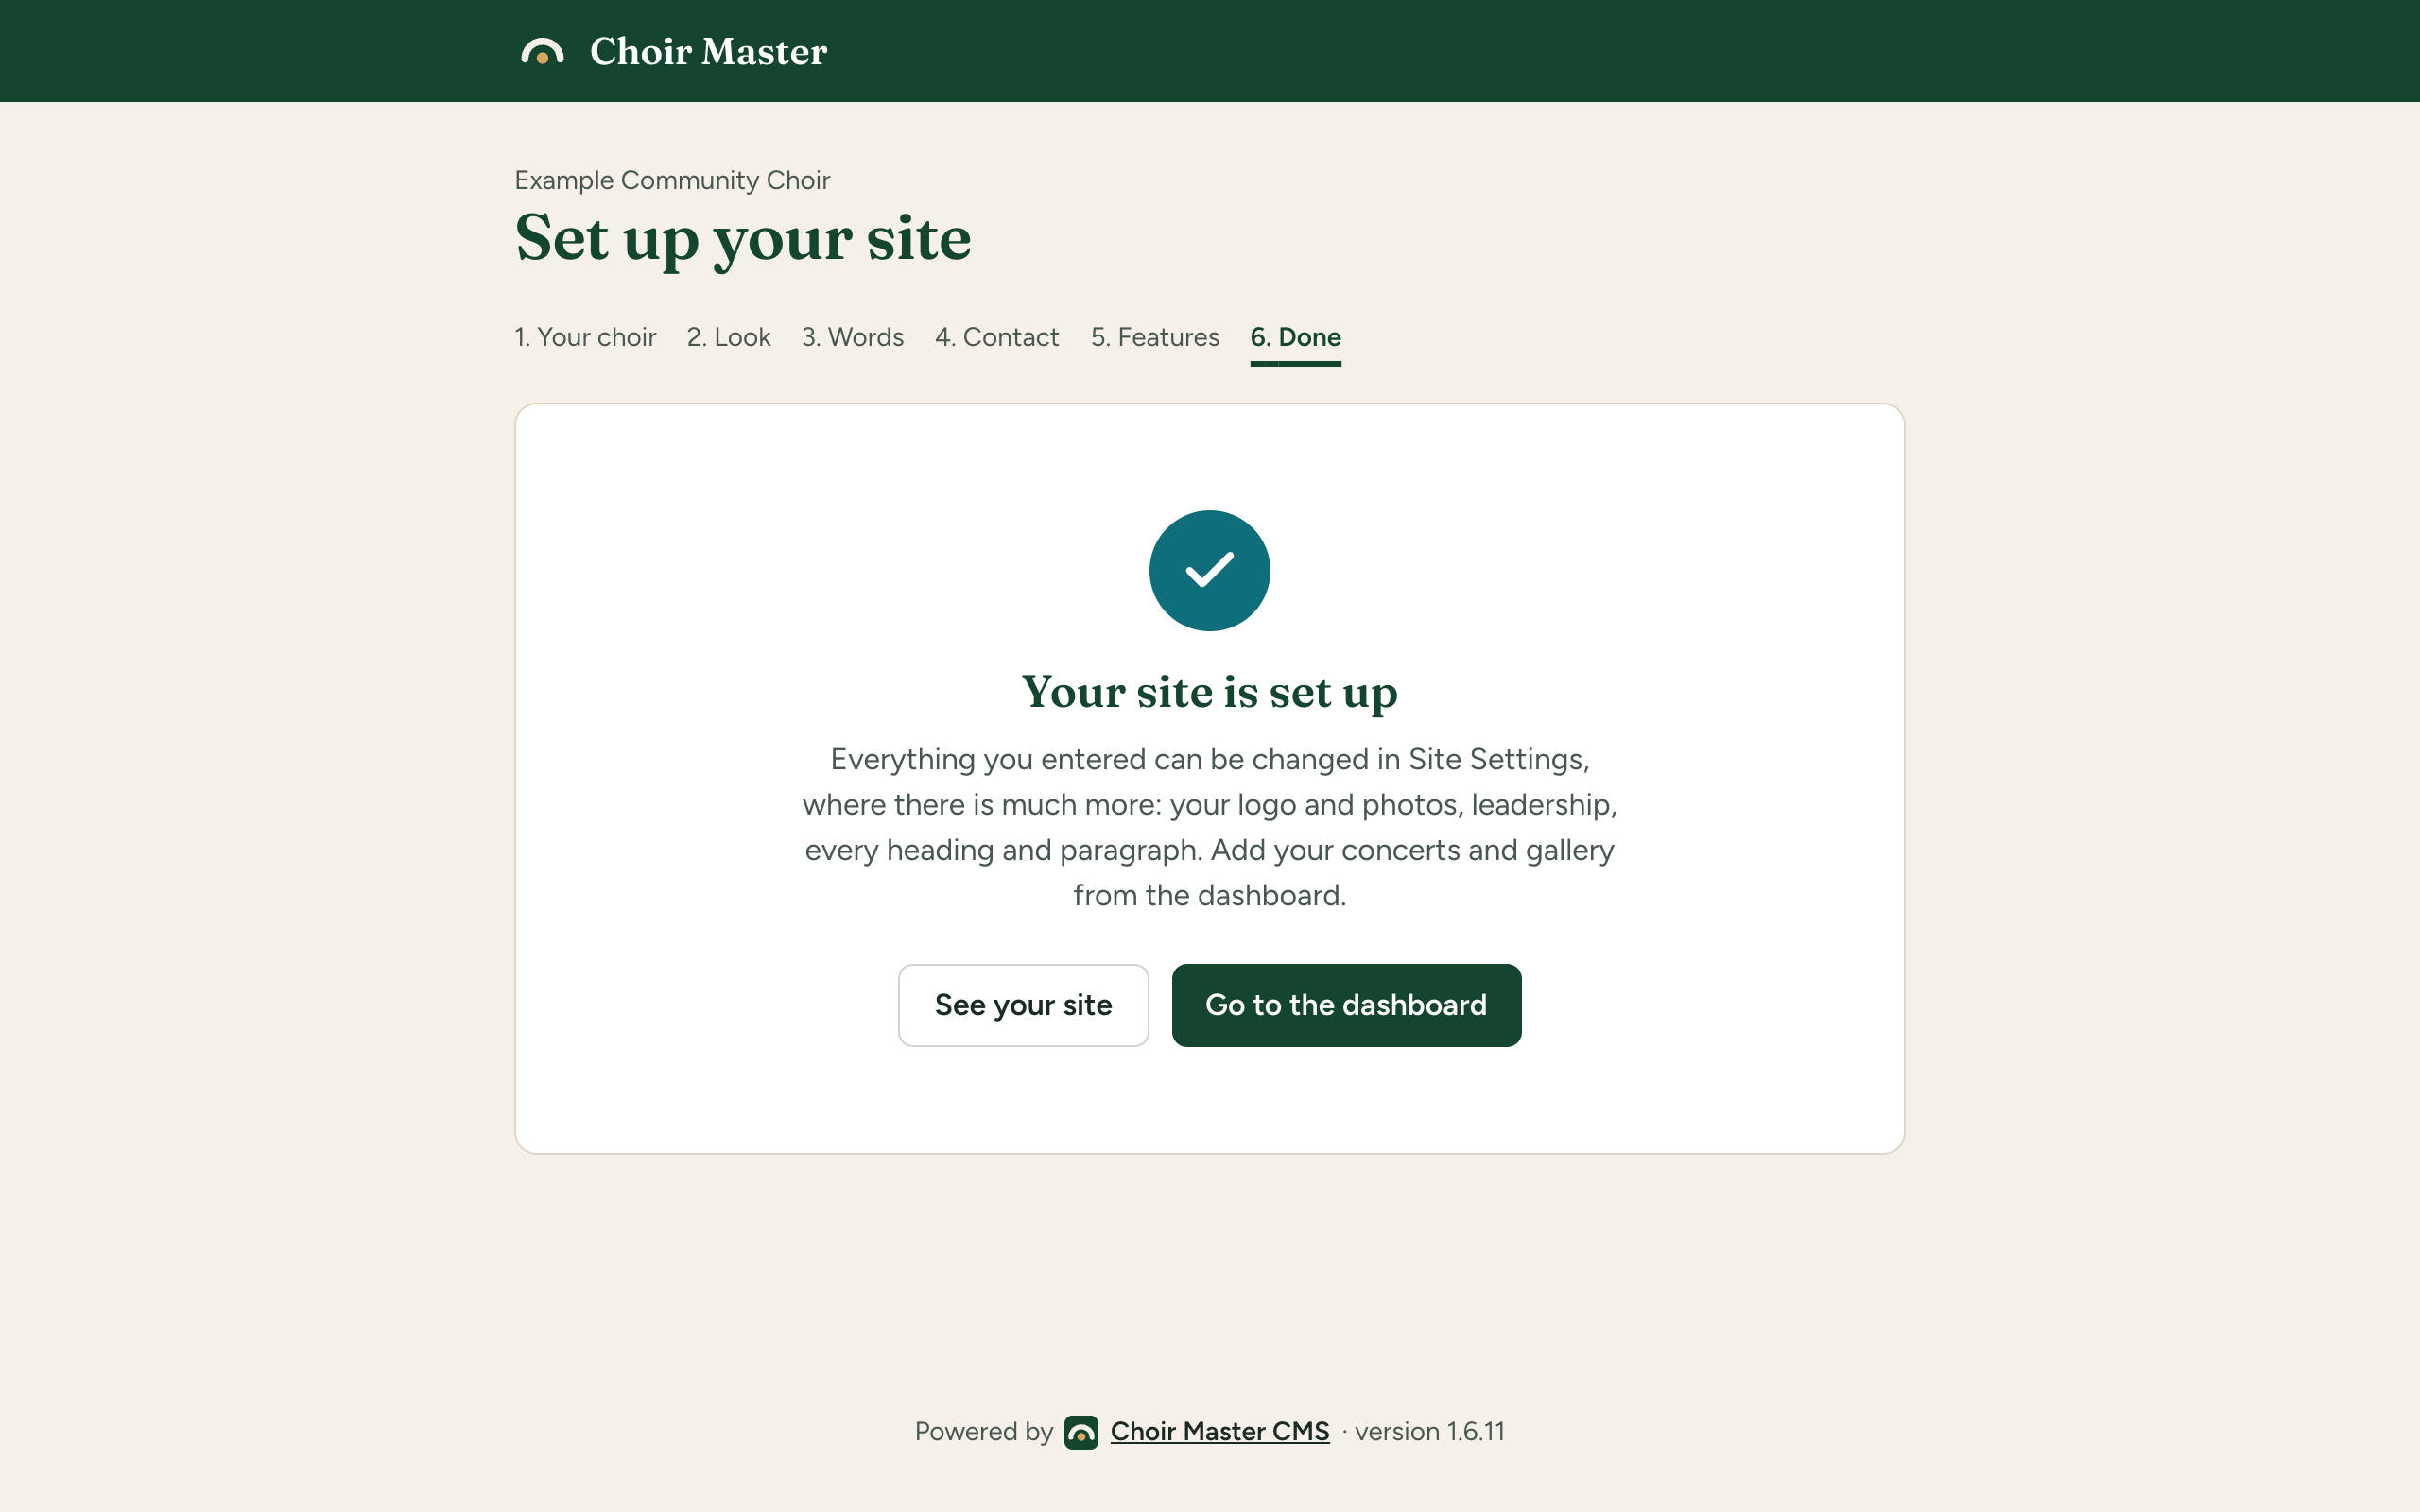
- See your site opens your public site in a new tab.
- Go to the dashboard finishes the setup and opens the dashboard.
Press Go to the dashboard even if you looked at your site first: that is what marks the setup as finished. If you close the tab instead, you are taken back to the setup next time.
Where to change each answer later
Everything is in Site Settings, in the section named below. How Site Settings works explains the page.
| What you entered | Site Settings section | More |
|---|---|---|
| Choir name, town, province, country, year founded, currency, time zone | Choir | Your choir's name, place, currency and time zone |
| Tagline | Choir | Your choir's name, place, currency and time zone |
| Look | Theme | Choose a ready-made theme |
| Welcome line | Home: Hero | The top of your home page |
| About the choir | Home: About | About your choir and its leaders |
| Email, phone, address, introduction | Contact | Contact details and social media |
| Features | Features | Switch pages and features on or off |
The kind of choir is not in Site Settings. It is only used inside the setup, for the suggested look and the writing assistant.
If something goes wrong
| What you see | What it means |
|---|---|
| A message at the top of step 1 naming a box | A required box is empty. Fill it in and press Save and continue again. |
| That could not be saved., or another message at the top of a step | The site refused what was in one of the boxes, or could not be reached. Read the message, correct the box it names, and try again. Nothing from that step was lost from the page. |
You open /admin/setup and land on the dashboard | You are a Manager. Setting the site up is for a Site Admin or an Admin. |
| You are never offered the setup | It has already been finished or skipped, possibly by another admin. Use Site Settings instead. You can still open it by typing your site's address followed by /admin/setup. |
After the setup, carry on with After setup: a checklist.