Update by hand: Node and Cloudflare
If your site cannot update itself, because it runs on Cloudflare Workers, has UPDATE_MODE=notify, or was started with npm run start:direct, the Updates page shows the steps for installing a release by hand instead of an Update now button. This page explains those steps, points out where they can go wrong, and gives a safer way to do the same thing. It is for whoever runs the server. For Docker, see Update a Docker site.
What the Updates page prints
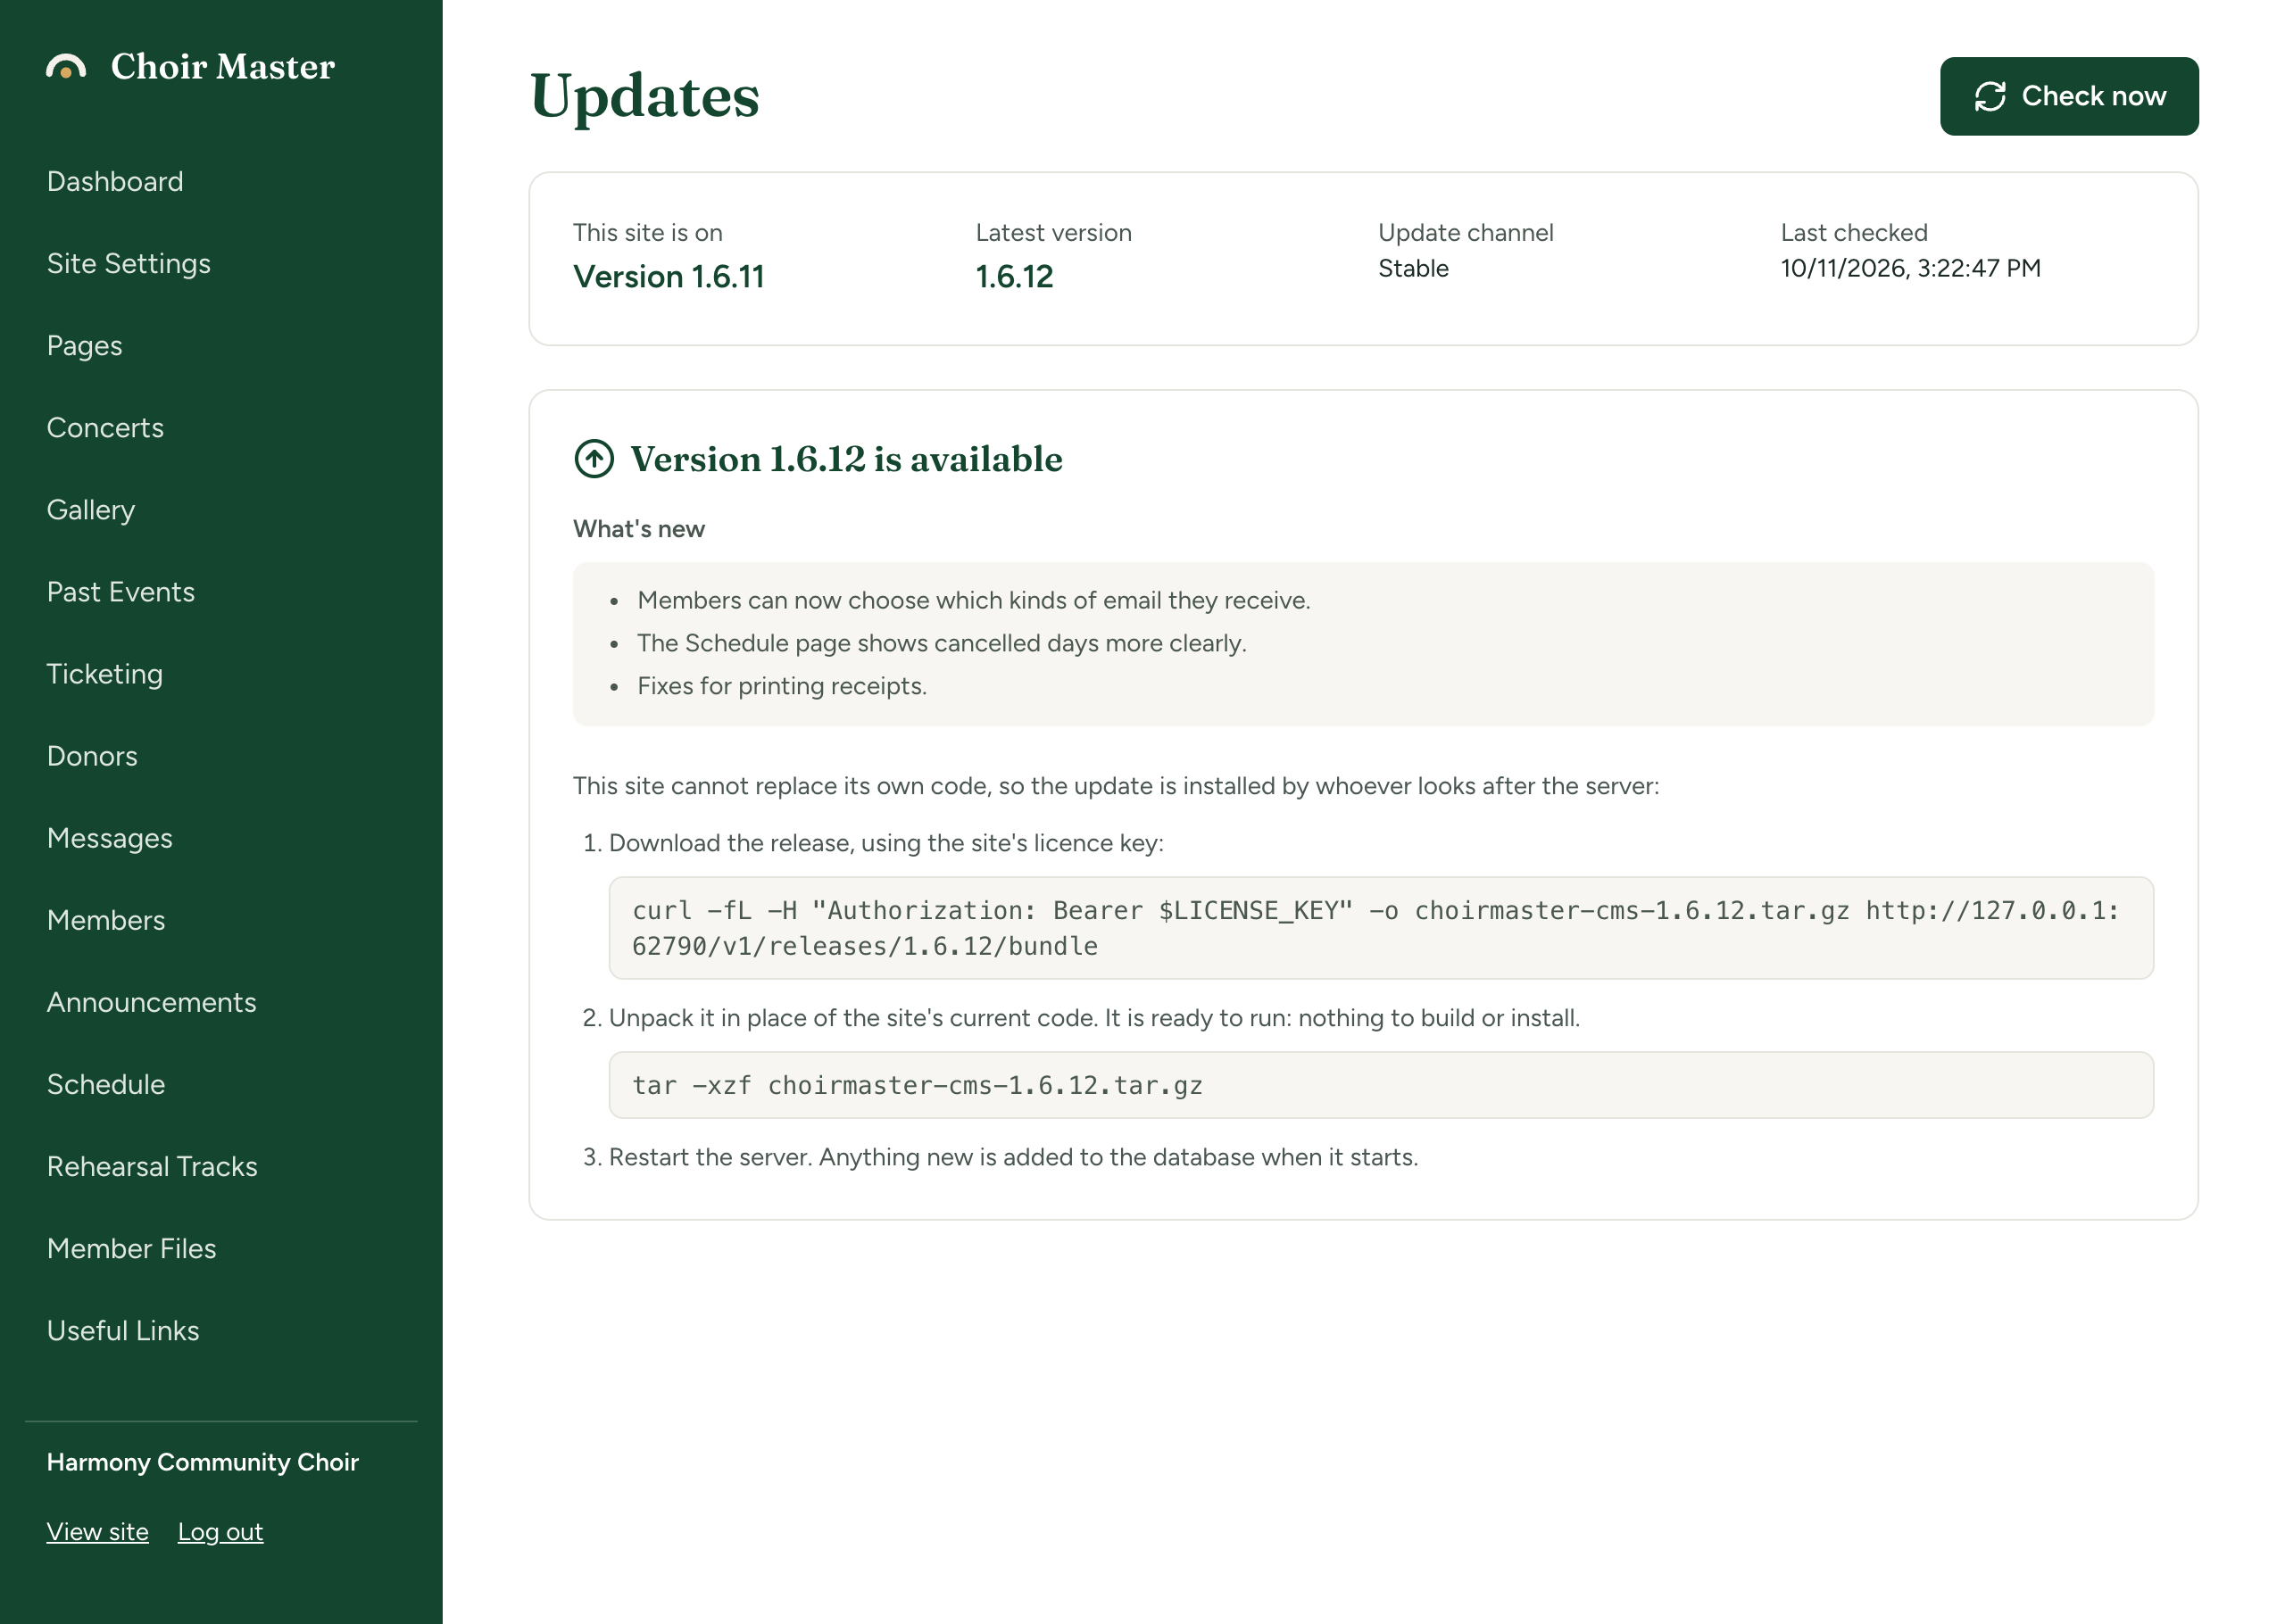
For a Node site:
- Download the release, using the site's licence key.
- Unpack it in place of the site's current code. It is ready to run: nothing to build or install.
- Restart the server. Anything new is added to the database when it starts.
For a Cloudflare site:
- Download the release.
- Unpack it over your copy of the site, keeping your
wrangler.toml. - Add anything new to the database (safe to run every time).
- Deploy. The release is already built, so there is nothing else to run.
The page fills in the real version number and download address. The download step looks like this (your release server address is UPDATE_URL, https://updates.choirmastercms.com by default):
curl -fL -H "Authorization: Bearer $LICENSE_KEY" -o choirmaster-cms-1.6.12.tar.gz https://updates.choirmastercms.com/v1/releases/1.6.12/bundle
$LICENSE_KEY must be set in your shell. To avoid leaving the key in your shell history, type it in without echo:
read -rs LICENSE_KEY && export LICENSE_KEY
The download is a single .tar.gz file. It holds the built site (dist/), the server (server/, shared/ and scripts/), its dependencies in node_modules/, package.json and package-lock.json, site.config.json, the two wrangler.toml.example files, CHANGELOG.md, the licences (LICENSE.md, LICENSE.fr.md) and NOTICES.md. It does not hold a Dockerfile or compose file.
The rough edges of unpacking over the old folder
Unpacking a new release into the folder that holds the old one works, but:
- Files that a newer version no longer has stay behind. They are harmless to the new code but clutter the folder, and they make "what is installed" harder to know.
site.config.jsonis replaced. It is the file that holds the default settings for a new site (see Ship your own defaults). If you edited it, your edits are overwritten.- Nothing stops you unpacking into the wrong folder, or a folder the server is still running from.
For these reasons the method below unpacks each version into its own folder and switches to it.
Node: update with a new folder for each version
Set the site up once so that updating is simple
Keep the code, the settings and the data apart:
/srv/choirmaster/
  choirmaster.env        the settings, including LICENSE_KEY
  data/                  the database and uploaded files
  app-1.6.11/            one folder per version
  current -> app-1.6.11  a link to the version in use
Make the data location absolute in choirmaster.env, so it does not depend on the folder the server is started from:
DATA_DIR=/srv/choirmaster/data
SQLITE_PATH=/srv/choirmaster/data/choir.sqlite
STORAGE_LOCAL_DIR=/srv/choirmaster/data/storage
If these are left at their defaults (./data/...) the data lives inside whichever folder you start the server from, and a new version folder starts with an empty database. Check this before updating. Run the server from current:
cd /srv/choirmaster/current
node --env-file=../choirmaster.env server/launcher.js
A systemd service does the same with WorkingDirectory=/srv/choirmaster/current. See Run it as a systemd service.
Update
-
Take a backup. See Back up a single-server site.
-
Download the new version into
/srv/choirmaster(see thecurlcommand above). -
Unpack it into a new folder:
cd /srv/choirmastermkdir app-1.6.12tar -xzf choirmaster-cms-1.6.12.tar.gz -C app-1.6.12 -
Compare
site.config.json. If you have never edited it, skip this step. If you have, see what changed and carry your edits over:diff app-1.6.11/site.config.json app-1.6.12/site.config.json -
Stop the site, switch the link and start it again (the service here is called
choirmaster; use your own service's name):sudo systemctl stop choirmasterln -sfn app-1.6.12 currentsudo systemctl start choirmasterWithout systemd, stop the running process and start it again as shown above. The new version adds anything new to the database as it starts (unless you have set
DB_AUTO_MIGRATE=false; then runnpm run db:migratefromcurrentbefore starting it). The site is down for the few seconds this takes. -
Check the new version is running:
curl -s http://localhost:3001/api/healthThe answer is like
{"status":"ok","platform":"node","version":"1.6.12"}. Use your ownPORT. On the Updates page, This site is on should show the new number.
If this site has ever updated itself with the button, DATA_DIR/releases may hold a downloaded release newer than the one you just installed. The newer one keeps running and your hand-installed version is ignored: /api/health reports the downloaded version, not the one you installed. Stop the site, delete the releases folder in DATA_DIR, and start it again. See How updates work.
Old version folders can be deleted once you are happy. Keep the last one for a while: it is your way back.
Go back to the previous version
Schema changes between versions only ever add tables and indexes, so the previous version keeps working on a database that a newer version has already started. To go back:
sudo systemctl stop choirmaster
ln -sfn app-1.6.11 current
sudo systemctl start choirmaster
If you need the database as it was before the update, restore the backup you took: see Restore a backup, or move to a new server.
Node: unpack in place
This is what the Updates page describes. It is quicker and fine for a site you have not customised, if you accept the points above:
cd /srv/choirmaster/app
tar -xzf ../choirmaster-cms-1.6.12.tar.gz
sudo systemctl restart choirmaster
Do it with the site stopped, and take your own copy of site.config.json first if you have edited it.
Cloudflare: update a Worker
You need the folder you deployed from, with its wrangler.toml, and a shell logged in to Cloudflare (npx wrangler whoami). The download does not include wrangler; npx fetches it the first time, so the computer needs internet access.
-
Download the release as above.
-
Unpack it into a new folder and bring your
wrangler.tomlacross.wrangler.tomlis never part of a release, so it is only ever in your old folder:mkdir choir-1.6.12tar -xzf choirmaster-cms-1.6.12.tar.gz -C choir-1.6.12cp choir-1.6.11/wrangler.toml choir-1.6.12/cd choir-1.6.12wrangler.tomlholds your database and key-value ids and your domain. Compare it with the newwrangler.toml.examplefor anything added; see wrangler.toml explained and Changes a release needs inwrangler.tomlbelow. -
Add anything new to the database. This is safe to run every time because the schema file only creates what is missing. Use the
database_namefrom yourwrangler.toml:npx wrangler d1 execute choir-db --remote --file=./server/db/schema/sqlite.sqlSkipping this can leave a new feature without its table, and it will fail until you run it. See The site will not start, or ignores my settings.
-
Deploy. The release already contains the built site, so do not run
npm run build:npx wrangler deploy -
Check the new version: open
https://choir.example.org/api/health. The answer includes"platform":"cloudflare"and the newversion.
To go back, run npx wrangler deploy from the previous version's folder.
Changes a release needs in wrangler.toml
Your own wrangler.toml is not part of a release and is never changed by one. When a release needs something new in it, the release notes say so, and wrangler.toml.example in the download shows it. So far there has been one such change.
Version 1.6.12: two lines in [assets]. They let the Worker put your choir's name, description and link-preview tags into the page it sends. In your wrangler.toml, add the binding line and replace the run_worker_first line, so that the section reads:
[assets]
directory = "./dist"
binding = "ASSETS"
not_found_handling = "single-page-application"
run_worker_first = ["/*", "!/assets/*", "!/images/*", "!/favicon.svg"]
Then deploy. Change both lines in the same edit:
| What you changed | What you see |
|---|---|
| Neither | The site works exactly as before. A shared link to it is titled "Choir". |
Only added binding | Nothing changes: still "Choir", and the log no longer mentions it. |
Only replaced run_worker_first | Every page answers {"success":false,"error":"Not Found"}. The API still works. Add the binding line and deploy again. |
| Both | Pages carry your choir's name. Each page view is now one more request to your Worker and one read of your settings from D1. |
Check it after deploying:
curl -s https://choir.example.org/ | grep -i '<title>'
The answer should be your choir's name, not <title>Choir</title>. The full account, including what happens if the settings cannot be read, is in Your choir's name in the page.
A site on Node or Docker has nothing to change for this: it serves the page with your choir's name as soon as it runs 1.6.12.